Weaver Xtreme Theme Documentation - Version 2.0
Customizer Option Interface
The Weaver WordPress theme has been one of the most popular themes available at WordPress.org since 2010. Weaver Xtreme is the latest generation of the Weaver theme family.
Weaver Xtreme Version 2.0 add a totally new option interface using the WordPress Customizer. This new interface is essentially WYSIWYG and will completely change how easy it is to create a totally custom theme.
Table of Contents
-
Getting Started with the Customizer
- Weaver Xtreme Theme Overview
- How to get started
- All About Your Site's Home Page
- Design Hints
- Weaver Predefined Subthemes
- Weaver Options Reference
- CSS+
- Genericons - Add Icons to Your Content
- Mobile
- Weaver Advanced Options
- Per Page and Per Post Options
- Admin Options
- Weaver Xtreme Helper Classes
- Styling Hints
- Weaver Xtreme Plus
- Shortcodes
- Save/Restore Themes
- Weaver Page Templates
- Post/Page Editor Styling
- Entering Raw HTML and Scripts
- Post Formats
- Custom Menus
- Custom User Interface Messages
- Built-in Support for Other Plugins
Woocommerce, WP PageNavi - Compatible Caching Plugins
- Using Weaver in your language
- Internet Explorer Compatibility
- Technical Notes
- EU/UK Cookie Information
- Weaver Xtreme HTML<div>Hierarchy
- Weaver Xtreme Class Reference
- Switching from Weaver II
- Release Notes
Getting Started with the Customizer
Weaver Xtreme Version 2.0 has added WordPress Customizer support for all of its options. This new interface totally revolutionizes the way you work to create you own site. Weaver Xtreme is simply unique in the completeness of the options available, and how simple the Customizer makes finding and tweaking your options.
Most options are truly What You See is What You Get: change a color, border, font, or margin, and the change appears instantly on the preview window. You can literally see the changes in real time as you tweak the values. This is truly a magical experience. Other options work in refresh Customizer mode that requires the previewed page be refreshed - which usually takes just a second or two. Still amazing.
The previous option menus are still supported, but after using the Customizer interface, you probably won't want to go back to the Legacy Setting interface. It can be useful if you have a slow computer or site host as the new Customizer does require fast computers and browsers for an optimal experience.
Weaver Xtreme Customizer Interface
The customizer ( Appearance > Customize ) offers the ability to do interactive editing of the theme settings. When making changes in most option setting, the preview window will show the changes in real time, which is a great help for tuning things like colors, padding, spacing etc. Some changes are more complex and may need a refresh of the preview window to show the changes.
The Xtreme Customizer offers two ways to reach any given set of options.
1- Main Panel
The left panel of the customizer holds the main navigation of the theme options.
It first shows WHAT things that can be changed ( colors, spacing, style … ). Once you select WHAT you want to change, it will show a list of WHERE you can make that change ( wrapping areas, header, content… ). As you select WHERE you want to make a change, you get to the actual options.
The left panel has two possible width so you can optimize options space vs preview space. You can increase / decrease the width of the left panel by using the small arrow button right of the Saved / Save & Publish button located at the top right of the navigation panel.
The left panel can also be collapsed entirely, to increase preview area, using the collapse button at the bottom left. You can bring it back by hitting that button a second time.
2- Quick Access Menu
Using the left panel to navigate the options can be tedious if you have to go back and forth a lot between settings. You have to scroll to the top of the option panel, then navigate back, then down …
To make it easier to quickly reach any option, there is a Quick Access Menu at the top left of the option panel ( hamburger icon just right of the X that closes the customizer ).
As you place your mouse over it, it shows you both the WHERE choices, and the WHAT choices. Unlike the default navigation panel, the quick access menu lets you choose if you want to start selecting WHERE to do the changes, or WHAT change you are after. Just move your cursor over your preferred choice, then down the list to make a selection.
If you select a WHAT item, it will open the list of WHERE options for it, if you select a WHERE item, it will open the list of WHAT options for it.
This lets you directly select any set of options without having to navigate in the left panel.
If you Collapse the left Panel, the Quick Access Menu will remain over the Preview Area, so you can still access any option while the left panel is collapsed. If it is in an inconvenient location, you can move it anywhere you like over the preview area by just dragging it with the mouse.
When you make a WHAT/WHERE selection, it will automatically reopen the Option Panel.
Customizer Option Organization
The Customizer option menus for Weaver Xtreme are organized somewhat differently than the Legacy Settings. Even though there are over 600 options available, the new Customizer organization of the options can make it seem like there are only about 20 different option sets available.
First Level Options: WHAT to Set - Option Categories
The first level of Weaver Xtreme Customizer menus is organized around different categories of options that reflect different collections of related options. For example, all the Color settings are found on a single, top-level option panel called "Colors". The other top level option panels represent similar groups of options:
- Colors - Specify all colors used on site - both text and background colors.
- Spacing, Widths, Alignment - Set margins, padding, spacing, heights, and widths.
- Style - Set borders, shadows, rounded corners, list bullet style, icons.
- Typography - Set font family, font size, bold, italic, default base font information.
- Visibility - Show or hide various elements - usually by device ( phone, tablet, desktop ).
- Layout - Specify element layout - sidebars, etc.
- Images - Set borders, placement, Featured Images, Header Images, Background Images.
- Added Content - Define added content for extra HTML insertion areas.
- Custom CSS - Advanced users can specify custom CSS for the whole site or specific areas.
- Sidebars & Widgets Content - the standard WordPress interface for widget areas and widgets.
- Custom Menu Content - the standard WordPress interface for defining custom menus.
The top level Customizer menu also has two additional menus:
- Weaver Xtreme: Start Here - access to getting started help and other documentation.
- General Options & Admin - WordPress Site Identity and Static Front page options, and other theme admin options.
The basic logic behind this organization is that it is easy to remember the different kinds of things you want to customize, like color or spacing. The next level of menus specifies where you want to make those changes.
Second Level Options: WHERE to Set - Areas
Deciding what you want to customize is usually an obvious decision. Finding where to apply those settings take a bit more understanding just how a Weaver Xtreme WordPress site is organized.
We've tried to make this second level step as easy and consistent as possible. Almost every one of the option categories can be applied to the same set of areas. The "standard" set of areas include:
- Wrapping Areas - the major outer areas that wrap the site's content. The main Wrapper Area wraps the entire site, while the Container Area wraps the page or post content and the main sidebars.
- Links - Not all categories apply to links, but links are treated as a single element to style.
- Header Area - the header area is displayed at the top of the site, and includes the site title and tagline, the primary and secondary menus, the site header image, a header widget area, and an extra area for arbitrary HTML.
- Menus - there are a Primary and Secondary menu available in the Header Area. Weaver Xtreme Plus also supports Extra menus that can be displayed in different locations.
- Info Bar - the Info Bar is displayed immediately below the Header Area, and shows navigation information, as well as other custom content.
- Content - the content area displays page and post content.
- Post Specific - the Content styling will be applied to both page and post content, but this section allows you to have specific styling for posts and blog views.
- Sidebars & Widget Areas - styling for the various Sidebars and Widget Areas.
- Individual Widgets - styling for individual widgets displayed in the Widget Areas.
- Footer Area - the footer area at the bottom of the site. This includes a widget area and an extra custom HTML insertion area.
- Global Options - some of the Option Categories can include other sections that can apply to global settings. Typography, for example, allows you to specify various global options such as base font size.
Site HTML Organization
The above list of areas gave a general outline of how Weaver Xtreme organizes the HTML of a site. It can be useful to have a more specific and technical understanding of site layout.
For more advanced customization of your site, learning how how the various parts of the site are organized can be essential. Not surprisingly, Weaver Xtreme relies heavily on the basics of HTML <div>s and the "Cascading" part of CSS. The following diagram illustrates the cascading nesting of the Weaver Xtreme design.
widgets
6 different layouts
widgets
The Next Step
This has been a fairly brief overview of the Customizer interface to Weaver Xtreme options. Because of the WYSIWYG and quick refresh feedback on all the options, you can easily experiment with different settings. Remember, nothing is permanently saved until you click the "Save & Publish" button, so feel free to simply play around with the options.
The rest of this document contains more details about the various options, and explanations of features for more advanced WordPress site designers using Weaver Xtreme.
Weaver Xtreme Theme Overview
The Weaver Xtreme Version 2.0 WordPress theme represents an almost revolutionary improvement over Version 1. The new WYSIWYG Customizer interface drastically changes the site designer's experience.
Weaver Xtreme itself was a major re-write of its predecessor, Weave II. Almost all of the code that directly outputs content was completely re-written. The layout design is now 100% responsive, and various aspects of the design are now heavily oriented to responsive design. The use of px sizes is essentially completely gone - all size units are percent, em, or other responsive values. Among other things, this means that text sizes, padding, and margins are now specified as a general size - small, medium, large, etc., instead of using specific values. This is a much better and easier approach for a truly responsive site.
As with previous versions, Weaver Xtreme allows you to change colors, fonts, sidebars, and other aspects of your site's look. In addition, it allows you to easily add whatever special code you might need ( such as advertising tracking code ), all from either the new Customizer Interface, or the legacy "check mark" based theme admin page. It also has many per page and per post options, along with several page templates, that will allow you to totally customize the look of your site.
Weaver Xtreme includes its own translation files for over 20 languages. There are about 100 visitor side messages, and it is fairly simple to create a Weaver Xtreme translation file for new languages. If you create your own new translation file, we would be happy to include it in the official Weaver Xtreme distribution.
It is easy to design your own site look. You can start with one of many pre-defined subthemes, and change the settings to meet your needs. It is easy to get started: you just have to pick colors and click on check marks.
For more advanced developers, there a many options for fine tuning. These include custom CSS, options to add HTML to various areas of the screen, and several ways to display posts in places other than the standard blog page.
How to get started:
- Select one of the predefined subthemes. There are many to choose from. The predefined subthemes are found on the Appearance → Weaver Xtreme Admin → Weaver Xtreme Subthemes menu.
- Open the Appearance → Customize menu. Play around with the various, and instantly see how the theme you selected changes. This may be enough to get a custom theme you like.
- Finally, read this help document. There are lots of tips here, as well as fairly detailed explanations of exactly which CSS rules Weaver supports, and hints on how to go beyond the basics and really customize your site.
Previous Versions of Weaver
There have been three different versions of Weave: 2010 Weaver, Weaver, and Weaver II.
Weaver Xtreme is a completely new theme. Much of its design is fundamentally different than Weaver II, and previous settings cannot be converted automatically. However, it is fairly easy to manually create new settings that correspond very closely to existing Weaver II sub-themes. Please see the Upgrading from Weaver II section for more detail.
Using With WordPress Multisite
Weaver Xtreme will work with no additional settings on WordPress Multisite installations. However, there are some extra settings that help control which options are available to Multisite users.
Note that all non-checkbox options for this theme are filtered based on the 'edit_theme_optionsl' user capability which is determined by the account role. This mostly means that non-Admins cannot add <scripts> or <style> directives anywhere. Regular Administrator and Super-Administrators can enter anything.
Note that non-Administrator accounts are not able to see Weaver Xtreme options on their Dashboard. However, the Per Page and Per Post options will be displayed by default to users with creation roles. You may want to restrict this on a per site basis. Either the Super-Administrator, or an individual sub-site Administrator can restrict access to the Per Page and Per Post option based on user role from the General Options & Admin → Admin panel.
All About Your Site's Home Page
Your Home Page is the one that is displayed when a visitor enters the address of your WordPress Site. Commonly, your blog will serve as the home page, and WordPress will automatically add a Home item as the first item on your menu bar. ( That is the default WordPress setting. ) If you instead want a static page as your home, you can go to the dashboard Settings→Reading menu, and click the 'A static page' option, and specify an existing static page to serve as Home. ( It will be called Home on the menu even if it has a different name when you created it. ) If you don't want a blog at all, you can leave the 'Posts page' option as '--Select--', and no blog will be displayed. If you specify the name of an existing static page, then the default blog will be displayed using the title of that page. The content of that page ( as well as the page's template, such as Page with Post ) is ignored: that static page serves only to set the title for the blog page.
Weaver Xtreme gives you options on just what appears as your home page. The Visibility→Menus panel has an option called 'No Home Menu Item'. If you check that, the automatically generated Home menu item goes away. That means if you have your blog set as the home page, there won't be a Home menu item to get back to it, but entering just your site name will get you to the blog.
All that can be very confusing, to say the least. Here's how to get exactly what you want as your Home page.
- Create a static page that you want to serve as your Home page - If you want it called Home, then give the page Home as its title. Add content as needed. If you want this page to be your Blog Posts, then use the Page with Posts template when you create the page, and check the 'Hide Page Title' in the Per Page Options section. Don't add any additional content.
- Check the 'No Home Menu Item' option in the Visibility→Menus panel.
- On the Settings→Reading menu, check the 'A static page' option, and specify the page you defined in step 1 as the Front page. Set the Posts page top to '-- Select --' if the static front page you specified will be your blog page or you don't want any blog page at all. If the blog will be on a non-home page, then enter the name of a blank place holder for the blog, as usual.
- You can use a Page with Posts page as your blog page, either as the Home page, or as a secondary page. Step 1 explained how to make it your Home page. Use the method of Step 3, and set the Posts page option to --Select--. This step is important. If you specify the static "Page with Posts" page in the selection box, you will end up with get the default blog page, and not your "Page with Posts" and any options you may have set for that page. And the main reason to use a "Page with Posts" for your blog page is to add filters to control just which posts are displayed -- something you can't do if you use the default Home page.
Design Hints
This section has a few hints on designing your own theme.
Choosing Colors
Good themes use related colors. They don't have to, but having a nicely matching set of colors is generally considered good design.
The color picker allows you to use the cursor to select a color. You can specify transparency on the bottom bar. You can also manually enter hex, rgb, rgba, or named colors in the value box. If the color option had an initial value, you can click the "Default" button to restore the original color if you don't like your new color.
Some themes use the same colors for all links, some vary. But using the same link hover color for all the different kind of links lends consistency to your theme. The same is true for the other colors - try for a consistent look in your theme.
Testing
The new Customizer interface makes testing your ideas easy. Many options support "live" preview. You changes show immediately in the preview window. Other options marked with the ↻ refresh icon require a full page refresh of the preview window. This usually takes just a second or two.
Why aren't all the options live preview? There are various technical reasons for this. Some options ( like the sidebar layouts ) require that the actual generated HTML for the site be changed. This requires a refresh. Other options interact with the JavaScript used by Weaver Xtreme for some site layout. Others simply have a level of complexity that makes live preview too difficult. But we tried very hard to make as many options as possible display with live preview, and seeing that work is like magic.
Important: The changes you see in the preview window will almost always show up when you display your site in a different browser window. Depending on just how and when you display your site in a different browser window, there can be glitches. Most modern browsers will cache web pages it loads. Sometimes, this can make testing your site very difficult because the changes you make won't show up because the browser has cached your page. If you find this happening, you should clear the cache. Some browsers ( e.g., Firefox and Chrome ) have plugins available that will let you disable the cache.
Also, you can have both the Customizer interface and the Legacy Settings Admin interface open at the same time in different browser windows. Please be aware that these two windows don't "know" about each other. If you make a change in one settings interface, it won't show up in the other automatically. In addition, the change will override whatever changes you might have made in the other window. If you are using both at the same time, you if you make changed in one option interface window, you MUST then manually do a full browser refresh page for the other option interface to keep both windows in sync.
Saving Option Settings
The changes you make to options from the Customizer interface are really "trial" changes. They show up in the preview window, but they are not permanent until you save your changed by clicking the "Save & Publish" button in the top panel. If you navigate away from the Customizer without first saving your values, everything will be lost. Note that you will receive a warning popup asking if you really want to leave the page or not.
Saving Your Own Theme
Once you have a design you like, you can save your work. You can then fiddle and fine tune more without losing your previous work. The easiest way to save your work is to go to the Appearance → Weaver Xtreme Admin → Save/Restore tab, and use the Save/Restore Current Settings using WordPress Database option. This will save all your settings in the WordPress database. Any settings you make will be preserved until you save new ones. They will survive theme switches and upgrades. If you want to restore those saved themes, click the Restore Settings button.
Weaver Xtreme basic version also allows you to save and save your settings on a file downloaded to your computer. There are two types of settings files - one that just saves the theme related options ( and leaves out site specific options ), and another that saves everything. These files can be downloaded to your own computer, or use by others to share you site design. And you can save many versions of your work.
If you are experimenting, it is a good idea to save copies of your work so you can get back to where you were.
Weaver Xtreme Predefined Subthemes
Weaver X comes with many predefined subthemes displayed on the Appearance → Weaver Xtreme Admin → Weaver Xtreme Subthemes tab. You can use them as-is, or as a starting point for your own designs. When you select a new subtheme, all the options values that aren't marked with a diamond (♦) are cleared and set to the new values of the subtheme.
To select a predefined theme, pick one from the "Select a theme" list, and click the "Set to Selected Subtheme" button. Now you can open the Customizer to start customizing the theme in ways you like.
About Some of the Subthemes
- Plain - This is a minimal theme that represents a good starting point with minimal options set.
- Blank - This subtheme has no options set, and displays everything using default values and styling from the base theme stylesheet. If you want total control of what you are building, this is the subtheme to start with.
- Full Width Dark and Light ( and demos ) - The two subthemes are designed as good starting points for full width site designs. The Dark version is styled to effectively use a dark background. This can be simply a black background, or a dark image as found in the Demo version. The Light version is good for a light background. Using a plain white background results in a very simple, modern looking full width web site. The light demo has a light background image.
Both of the full width subthemes default to no sidebars, but that is easily changed. There are a significant number of custom CSS+ rules associated with these subthemes, and will require a bit of understanding and careful tweaking to make them your own. - Transparent Light and Dark - these are designed with transparency designed for dark and light background colors or images.
Weaver Options Reference
The Customizer provides you with hundreds of"check box" options for customizing your theme. This might seem overwhelming at first, but the options have been grouped as explained in the introduction. Many of the options have been added after multiple requests from users on the Weaver Forum, and may not be anything you care about. Remember, these are choices - it is unlikely that any one site design will use all the available options.
Custom CSS Options
For more experienced users, it is easy to add extra CSS styling using the Custom CSS panel. You can enter CSS style rules, enclosed in {}'s. The CSS you add to the pop-open CSS box will apply to the associated area.
Please see the CSS Help document to get more details on adding Custom CSS.
Wrapping Areas
The Wrapping Areas sections contain options that affect the overall look of your site, including both content and widget areas. These combine to give your site it overall look, including things such as width, outer margins, and more. The entire site is built under the Wrapper, and Container areas. Hint: You might want to experiment setting the options to primary colors ( e.g., red, green, blue ) just to get an idea of how they fit into the big picture.
Sidebars & Layout
Weaver Xtreme supports these sidebar layout arrangements from the Layout panel:
The sidebars support two widget areas ( Primary and Secondary ). There
are other widget areas supported, and described in the next section.
Weaver Xtreme allows control over site page layout, including margins, sidebar layout, and sidebar sizes. There are two major sidebar areas - one on the left of the site, and one on the right. The Layout tab allows you to control which layout is used for most of your pages. You can also set the layout for any individual static page from the Per Page Weaver option box displayed on the static Page Editor admin panel. Thus, you can essentially have any of the 4 different sidebar arrangements appear on any of your desktop view pages.
If you want a double column sidebar, you can specify multiple columns of widgets for any of the widget areas, including the Primary and Secondary widget areas. This is the "Columns" option found on the "Widget Area" option groups.
There are two different responsive display options for each of the 3 arrangements with sidebars. Normally, when the site is viewed on a narrow device, the sidebars will stack vertically above or below the main content area. In normal mode, both the primary and secondary areas will stack below the content. When you select the "stack top" layout, then the primary sidebar will stack above the content on narrow devices, while the secondary area stacks below. This allows the flexibility to have navigation in the primary sidebar area instead of the main menus.
One typical site design is to use one sidebar arrangement for regular pages - the blog, static pages, and single post pages, while using an alternate sidebar arrangement for the Archive-like pages - archives, categories, etc.
The basic version of Weaver Xtreme allows you to specify a sidebar arrangement for those two basic cases. You can also alternatively specify a different sidebar arrangement for your blog, static pages, and the single post page. These options will allow great flexibility in site look. You can also set the sidebar arrangement on a per page basis.
In addition, the Weaver Xtreme Plus version allows you to specify sidebar layout for each of the specific archive-like pages.
You can also specify the width of any of the individual sidebar widget areas. These are expressed as percentages. You can add more precision to the percentage if needed ( e.g., 24.375% ).
Widget Areas
As part of the over all responsive design of Weaver Xtreme, the spacing between widgets, widget areas, and the content area are now specified using a general size option, and intelligently added by the theme. The theme "knows" how to add margins on the different sides of widgets, widget areas, and the main content area. Normally, you will only have to specify the size of the margin or padding you want. However, the 'Padding on Sides' options allow you to specify which sides have padding.
"Disappearing sidebars" - If you find the sidebars are not displaying in the right place ( they will usually end up below the content area ), it means there is some incorrect HTML code in your page or post content. This is the most likely reason for this, although incorrect HTML in a widget ( usually a text widget ) can cause the same symptoms. This behavior is not due to any issues with Weaver Xtreme, but is inherently a part of the way HTML code works. The cause will almost always be a missing </div> tag ( or an extra <div> ). HTML uses <div>...</div> blocks to determine different parts of a web page. If your content has a missing </div> tag, then the bad HTML will confuse your browser, resulting in the incorrect display of the sidebar. So, remember this. If your layout gets "confused", or things don't look right, it is 99.9999% certain you have some bad HTML in your content. If you use Firefox, it will show unbalanced HTML tags in red if you view the page source. There area also HTML validation sites that can help you find the bad code.
Per Page Extra Widget Areas
Weaver Xtreme allows you to have as many widget areas you need. These new widget areas can be displayed on a per page basis. For example, using the Per Page options when you edit a page, you could have a different Top Widget Area, as well as different Primary or Secondary sidebars for every single page of your site if you wanted. You tell Weaver Xtreme to create these areas by providing a list of Widget Area names in this option area found at the bottom of the Sidebars & Layout tab. The names can include letters, underscores, dash, or numbers, but not any spaces or other special characters. You can name them as you will - mytop,mytop2,myprimary and so on. These names are then used in the Per Page option area on the Page Editor screen to specify replacement widget areas. You can also use these extra widget areas with the Weaver Xtreme widget area shortcode.
Important Note: You can reuse extra widget areas on different pages, but they should not be used more than once on any given page. If you use one of these extra widget areas more than once on the same page ( for example, in both the header and footer widget areas ), the layout results can be unpredictable.
Custom Widget Widths
With Weaver Xtreme Plus, you can optionally specify individual widget widths for most widget areas. This includes specifying widths for specific device: desktop, small tablet, and phones.
You can specify how much space each individual widget takes in a row of the widget area on a percentage basis. For example, say you have three widgets in the Primary Widget Area ( sidebar area ), and you want the first two on the a top row, each taking half the space, and the third on the second row on the desktop view. You would do this by entering the value 50,50;100; into the Desktop custom value box.
Enter a percent width for each widget, separated by a comma ( a blank will work, too ). You also must indicate the end of each row by using a semi-colon ( ; ) after the value of the last widget in each row. If you leave out the semi-colon, you might get unexpected wrapping.
Notes:
- Each row should add to no more than 100%.
- You can add as many widgets of varying widths to a row as you want.
- There is no limit to the number of rows.
- Don't add % to values.
- If you want to hide a specific widget on a particular device ( say on phones ), use 0 for its width to hide that widget.
- These custom values for specific device sizes override the Columns setting above the custom value boxes.
- The custom values entered for the Top and Bottom Widget areas apply to all top and bottom widget areas: Sitewide, Page, Blog, etc.
- These width settings use the fact that Weaver Xtreme
adds a numbered widget class to each widget in a widget area:
.widget1, .widget2, etc. So, for example, the rules generated for
the first example would look like:
@media screen and ( min-width:768px){ /*#primary-widget-area sb*/
        #primary-widget-area .widget {float:left;margin-left:0;margin-right:0}
        #primary-widget-area .widget-1{width:49.00000%;margin-right:1.00000%;}
        #primary-widget-area .widget-2{width:50.00000%;}
        #primary-widget-area .widget-3{width:100.00000%;}
}
Header Options
The Header Area is at the top of your site, and really gives the world the first impression of your site. Thus, there are many options for tweaking the site Header.
Weaver supports up to two menu bars. With no additional action, your menu will be built automatically using the pages you've defined ( using the Page Attributes parent and order settings ). Display of your posts ( blog ) in the menu is determined by how you've set the main Settings->Reading Front page displays options. To use a second menu, you'll need to use Appearance->Menus, and define the Secondary Navigation menu. If you define the Primary Navigation menu, it will be used instead of the automatic menu generation from the Page Attributes settings. Note that by using the Page with Posts template to create a blog page, combined with the Reading Front page displays setting, and the No Home Menu Item, you have complete control over menu content and blog display.
You also have several options for controlling basic display of the Site Title and Tagline. If these settings don't give exactly what you want, the very best way to get exactly what you want is to use a photo or image editor to add exactly the site logo or title you want - you can simply hide the default display of the site title and tagline in that case.
Weaver Xtreme supports the variable sized header images. You can also check "Hide Header Image" to hide it. The header image will always be displayed using the site's full width, even if the "real" size is the default 1100px width by 188px high. You can control how good the header image looks by varying its size and the compression ratio. Even so, you still must be aware of the file size of your header image ( indeed, ALL images on your site. ) Typically, you will want your image to be less than 100K bytes.
You can also control how much space is displayed after the header and before the content.
For ultimate control of the Header, it is possible to completely replace it on a site wide or per page basis using the Header HTML area or using the equivalent per page options.
Header & Footer Horizontal Widget Areas
Weaver Xtreme allows you to build great looking header and footer areas for your site using the Header and Footer Widget Areas. These areas support multiple widgets displayed horizontally in the header and footer areas. The Header Widget Area can be optionally placed in 4 different locations in the Header area using the "Header Widget Area Position" option on the Layout options tab. The Footer Widget Area is placed at the top of the Footer.
The free Weaver Xtreme version supports equal sized columns. Weaver Xtreme Plus supports columns of arbitrary width.
Consider this very simple example ( the uneven column sizes require Weaver Xtreme Plus, but the ideas are the same for the free version ). It has a menu on the left, a message next, the site name, and finally a banner image.
| Home Page 1 Page 2 |
Welcome to our site! |
Weaver Xtreme Theme |
You can use any widget in the Header Widget Area. It is likely the standard Text Widget will be very useful here. For example, you can insert a welcome message, as well as a banner image using the Text Widget. Because Weaver Xtreme adds support for shortcodes in the Text Widget, you can put almost any shortcode feature in your header. But you could also use a Menu widget, a slide show widget, an RSS feed widget - whatever you might want in your header.
Widget Layout
For ultimate control over the look of the Header ( or Footer ) widget area, you may need Weaver Xtreme Plus. There area advanced options that allow you to specify exact widths for each widget, and for different mobile devices. You can show all or a subset of the widgets available for the widget area.
Menu Bar and Info Bar
Weaver Xtreme allows you to control many aspects of the main menu bars, as well as the Info Bar. The Info Bar will normally be displayed right under the Primary Menu in the header. Depending on the menu content, it can be easy to confuse the two, and think that the Info Bar is a "doubled" menu.
Menu Bar
Weaver Xtreme allows you to control the menu bar colors, as well as the colors of the submenus and hover colors. You can specify bold or italic text.
Info Bar
The Info Bar is new to Weaver Xtreme. It provides two basic features - a "breadcrumb" menu that shows the path to the current page. On blog pages, there is an additional "Navigation Page" display that displays a numbered menu for quick access to a specific block of blog posts. ( Note: if you are using Yoast WordPress SEO and enable its breadcrumb support, Weaver Xtreme will automatically use Yoast's version instead of the built-in breadcrumbs. )
You can hide the info bar, as well as control if the info bar is displayed right after the menu bar ( thus taking the full width of the page ), or right above the content area ( thus only going to the sidebar ).
Links
Options for all links now appear with the area they are in. Many sites will use the same coloring and style for all links, but Weaver allows you to control the default links, Post Info Line links, and Widget links separately.
A separate color for Visited links has fallen out of widespread use, and is usually left the same as the regular link color. There is no direct option in Weaver Xtreme to set the visited link color.
Post Entry Title Link
Note that in WordPress, the title of each post is actually a link that will open the full single page view of each post. It is customary to style the post title to use the same color as page titles, but use a different hover color ( which usually matches the standard link hover color ) to indicate the title is a link.
Content Areas
The Content section covers options that affect both your static page content, and blog post pages. These options all work as explained. The Page Title Text option is slightly different in that it applies only to static pages, and not to blog post titles. Each blog post title is actually a link to the full view page of that post, and uses the Post Entry Title Link set the post title color.
Multiple Column Page Content
Weaver Xtreme has added an option to automatically break your page content into multiple columns ( from the Layout panel ). The option may be applied globally from the Main Options tab, or specified on a Per Page basis from the Per Page option box.
This is done using the CSS column-count attribute coupled with predefined Weaver Xtreme classes .col-1 through .col-4. The appropriate .col-n class will be added to the class of the <article> HTML that wraps the page content. You can define you own .col-n rules to compliment the predefined version to specify other column- attributes such as column-rule or column-gap. For ultimate control you may want to specify @media rules for mobile devices.
Leaving Comments
It seems that disabling Comments and Talkbacks for posts and static pages is one of the more common tasks that people want to do, but have trouble finding the right options to do it. I don't think the WordPress interface makes it very clear what is going on, because this topic may be the #1 most asked question on the Weaver forum. So, here's the scoop on controlling comments.
- This is really not a theme issue – the control is entirely done using regular WordPress options.
- Comments are controlled in the Dashboard Settings->Discussion page. There are quite a few options available, but if you want to disable comments by default for posts and pages, select the appropriate options on that page. ( Unchecking the first 3 boxes will do it. ) Don't forget about trackbacks and pingbacks because they can generate "comments" as well.
- If you've turned off comments by default ( and you will probably end up doing that because even with Akismet and a Captcha plugin, you're likely to end up with plenty of spam ), then you can re-enable comments for specific pages and posts from the Page and Post editor screens. There is an option panel on the Page/Post editor pages called "Discussion" with check boxes for that option. If you don't see that panel, you need to display it by opening the Screen Options tab in the upper right corner of the Page/Post editor page, and then check the Discussion show option.
- Now, if you created any posts or pages before you disabled comments, you'll have to go to each individual page and post and disable comments explicitly. Setting from the Settings->Discussion screen doesn't retroactively change the option. You'll have to delete any old comments you've accumulated as well.
- After you've done all this, by default, you will not see any reference to comments in the Post bottom info line, or at the bottom of regular pages. There is a Weaver Main Options in the Post Specifics section to display a "Comments are closed"e message if you want .
Post Specific
Next to the Header, it seems that control of just how Posts ( blog articles ) are displayed is something many people want. This section discusses some of the things you can control.
The Info Lines
Each post has two information lines ( also called Meta Info ). The line right after the title has the date of the post and the author. The last line of the post has the post's category, tags, and link for comments. You can control the appearance of these Meta lines in several ways. The two Info BG color settings let you put a background color behind the Meta lines if you wish, and you can add CSS to them for more effects. You can use the default Meta info wording with | separators, or use Icons for each part of the meta info. You can selectively hide different parts of the meta info ( which forces use of icons, however ). ( Comments will always be displayed if they are enabled and associated with a post. ) One of the design features of Weaver Xtreme is that it is dependent on the need to provide fixed translations for the user interface wording. Thus, it is not possible to change the wording such as Posted on date by author. If you don't like that wording, you can use icons instead. There are two choices of icon sets to use.
Full Posts and Excerpts
Posts are displayed in three distinct places: the main blog page, when part of a specified list ( archives, categories, author, etc. ), or when displayed as a single page by itself. The full content of a post is always displayed on the single page view. The blog page displays the excerpt of a post, which then causes a "Continue reading..." message to be displayed on the blog page. In special list views ( archives, etc. ), posts are displayed as excerpts. These excerpts are normally 55 words long, with all images, formatting, and links removed. You can adjust the excerpt length. You can specify to display full posts on special post list pages, and display posts as full articles on the main blog page ( which can be combined with the Featured Image to generate nice looking post list ). These can also be controlled on a per post basis from the Edit Post page. Note that checking a display as full post option does not override your manual placement of <!--more--> tags.
The Featured Image
You may have seen the Set Featured Image option on your post and static page edit panel. What is it good for? Unfortunately, there is no specific WordPress standard on how to use Featured Images. However, the most common practice is to display the Featured Image at the front of a page or post. Weaver Xtreme's design has attempted to maximize their usefulness.
There are four sets of options ( from the Images panel ) for how to use the Featured Image ( FI ): for Pages, for full and excerpted Posts, and for the single page post view. You can control when and where the FI is displayed for each of those cases, you can set the exact size ( in a responsive % size! ), and if the FI is hidden on different devices. You can even specify that the FI serve as an alternate header image for Pages and Single Post view.
No other theme offers you the choices for using the FI. Take time to explore all the options.
Other Options
You can set the background color for sticky posts. ( Add {border:none;padding:0;} to the CSS of the Sticky Post BG option to make sticky posts look like other posts. )
You can control author information display, as well. You can also show the author's avatar ( as defined by a gravatar.com account, for example ) on each post. By default, if the author has included biographical information on author's account settings page, that information will be included when the post's single page view is displayed. You can hide that.
When a visitor clicks on a image thumbnail, an attachment page will open up with the full sized view of the image. If you want your visitors to be able to leave comments for that image, check the Allow comments for attachments box.
Photo Blogging
Weaver Xtreme has a couple of features that make creating a Photo Blog easy. The three main features to help with creating a photo blog include:
- Multi-column blog layout. Weaver Xtreme free version
allows you to display your blog entries in up to 3 columns. Weaver
Xtreme Plus makes this even better by including support for
the Masonry dynamic layout feature which will squeeze your posts as
close together as possible in up to 5 columns.
You can specify the column layouts either globally from the Main Options -> Post Specifics tab, or on a Per Page basis if you are using the Page with Posts template using the Per Page option box on the page editor.
- The Compact "Post Format" Posts option will make each
post formatted using one of several "Post Formats" display in a
compact form. For Photo Blogging, this option is especially useful
for the Image Post Format. By default, the Image Post
Format will show the first image from your post with a
different post info line. But compact display option makes the
"Image Post Format" display only the first image found in a post
with no borders, no margins, no excerpt, and no extra text of any
kind - just a plain image. That image links to the post's single
page view. If there is no image, then the text content of the post
will be displayed. This allows you to include short descriptive text
between your images if you need. Other post formats have similar
compact versions.
- Page with Posts - this Weaver Xtreme page template allows you to show your posts as a blog anywhere you like, and include filtering and other per page options that you can fine tune to make a great looking Photo Blog.
Hints
Here are some hints for creating a Photo Blog:
- First, bulk load all your photos into the media library. You might want to update the photo title, alt, caption, and description fields when you upload, although you can do that later.
- For each photo you want in your blog, create a separate post. Give the post a description of each photo. It is probably best to have a separate post per photo. When you add the image to the post, remember to select you want the image linked - either to the raw image that displays the image only in your browser, or as an attachment that will display the image full size on a standard site page.
- Be sure to check the "Image" radio button for the post found in the Format box at the right side of the Post Editor page. ( If the Format box isn't showing, open the "Screen Options" in the upper right and check the appropriate box. )
- You will also likely find it useful to assign a Category to each post. You can use categories to organize different "albums", and then use a Page with Posts template's filters to display each album on a separate page. You can also use the categories to filter out images from your regular blog.
- Enable the Compact "Post Format" Posts option. This will show your images in a good looking, image only format on your blog pages. You can set this globally from the Images -> Post Specific section, or you can set it on a Per Page basis from the per page options box on a Page with Posts page.
- Each post can contain as much information as you like. As you add each image, you have the opportunity to fill in a caption, title, and alt tag. You can also add whatever commentary you like to the image. You can have as many images as you want on a post, but only the first one is displayed on the blog view.
- If you'd like some text mixed in with all your images on the blog view, you can easily accomplish that by creating a text-only Image Format post. You can use these comments to separate subjects, years, or anything else you might want.
- Display your Image posts using multi-column layout. If you have Weaver Xtreme Free Version, you can display your images in up to three columns. You can set the globally for all blog pages, or use the Per Page setting for a Page with Posts. You photos will be displayed as an image only organized in columns, laid out row by row, left to right. Whenever a visitor clicks an image, it will option the post's single page view.
- If you want even cooler photo layouts, upgrade to Weaver Xtreme Plus, and you will have access to the Masonry blog post layout feature. When enabled, Masonry will pack all your posts on a blog page in up to five columns, and remove all vertical space between posts with uneven height - no need for plain row by row layout. Masonry will work with standard blog posts, but works especially well with the compact image posts.
- When you use Masonry, you also have the option to specify on a Per Post basis that a post should span two columns ( available on the Per Post options box on the post editor ). This is especially useful to have your horizontally oriented images cover two columns. You can even specify this for regular posts for ones you might want to cover two columns.
- Typically, a blog page will display only a few posts ( 10 is typical ) before adding paging. The number of posts to display on a blog page is a global setting found on the Settings -> Reading tab. If you are displaying many photos in a compact format, you will want to show many more than just 10. There is an option included on the Page with Posts per page filter section that will allow you to set how many posts to show on one page.
- Remember, using Weaver Xtreme's Page with Posts template, you can create multiple blog pages on your site - standard text posts, photo posts, and any other kind of set of posts you can imagine - all by setting the appropriate filters on the Per Post option page.
Custom Post Info Lines
One commonly request is the ability to tweak the top and bottom info lines associated with blog posts. Weaver Xtreme Plus now includes a template function that gives you total control over the top and bottom info lines of posts displayed on a blog page, and posts displayed on the single page.
The custom info lines are set on the Content : Post Specific : Custom Info Lines tab. You can change the top and bottom info lines on blog pages ( including Page with Posts and [show_posts], and on the single page. You need to specify all options if you want the standard info lines replaced.
The text you specify can contain any valid HTML you wish, plus a set of special template %values% that will get replaced by the correct values for the specific post. For example, setting the Top Post Info line to:
<strong>%title%:</strong> %date-icon%%date% %author-icon%%author%
will create a top info line that looks like this:
![]()
The %title% is replaced by the post's title. The %date-icon% produces the calendar icon, while %date% produces the published date and link to the post. Similarly, the %author-icon% and %author% produce the author and link to the author archive page. Given a mixture of HTML, possibly including styling, and the provided set of parameters, you can build almost any combination of relevant information on the post top and bottom information lines.
There is no restriction on which values can be used on which line, nor other HTML you might wish to include. You can include whatever text you want mixed in with the definition. Some of the values allow you to override the standard text included with the standard values ( e.g., 'permalink' ). If you define an info line template, it will override any other info line setting you have ( except hiding and position swap ).
Here is a list of the supported template values:
- %date% - Replaced with the date link of post ( links to post single page )
- %date-icon% - Replaced with the standard date icon ( a calendar ). If used, should be used in conjunction with the %date% value ( and similarly for other -icon values ).
- %day% - Replaced with day ( 1-31 )
- %day0% - Replaced with day ( 01-31 )
- %weekday% - Replaced with name of week day ( e.g., for English, Monday )
- %month% - Replaced with full name of month ( e.g., January )
- %month-num% - Replaced with month number ( 1-12 )
- %month0% - Replaced with month number ( 01-12 )
- %month3% - Replaced with month abbreviation ( Jan )
- %year% - Replaced with 4 digit year
- %author% - Replaced with the author's name and link to author archive page
- %author-name% - Replaced with the author's name, no link
- %author-icon% - Replaced with the standard author icon ( a head and shoulders )
- %author-email% - Replaced with "mailto:" link to author.
- %avatar% - Replaced with a small version of the author's avatar ( gravatar, etc. )
- %category% - Replaced with a list of categories of the post ( with links )
- %category-icon% - Replaced with the category icon ( folder )
- %tag% - If the post has tags, replaced with a list of the post's tags ( with links )
- %tag-icon% - If the post has tags, replaced with tags icon ( tag )
- %tag:Label if are tags% - If you want a text label for tags, this will display the text that comes after the "tag:" if the post has tags. A post always has categories, so this form is not needed for categories - just add the text into the definition if you need a label for categories.
- %title% - replaced with the post title - not linked
- %post-format%- replaced with the post format of the post if it is defined ( no link )
- %comments% - Replaced with the standard link to the comment box on the single page. Not displayed if comments are disabled. Will have a different message for 0, 1, and >1 comments. You can change the messages displayed by %comments& using the 'comments0-2' values below.
- %comments-icon% - Replaced with the comment icon ( a bubble )
- %comments:Label if comments open% - If you want a non-linked text label for comments, this will display the text that comes after the "comments:" if the comments are open for a post.
- %comments0:Text if no comments% - Replaced with empty string, but sets the message used when no comments have been submitted for this post. Use a '#' in your string to display actual number of comments. ( Note: you must still use the %comments% option to have the comments link displayed. )
- %comments1:Text if one comment% - Used when exactly 1 post. Use a '#' in your string to display actual number of comments ( 0 ).
- %comments2:Text if more than 1 comment% - Used when more than 1 post. Use a '#' in your string to display actual number of comments ( 1 ).
- %the_permalink% - Replaced with the raw permalink address to the post appropriate to use as an href= value.
- %permalink% - Replaced with the permalink to the post - includes standard text ( permalink ), which can be replaced with value below.
- %permalink-icon% - Replaced with permalink icon ( chain ) plus the permalink string ( this is different than the other icon values, but this value needs to work this way. ) Unlike other -link values, you will never use both $permalink% and %permalink-icon%.
- %permalink:Permalink-text% - Used to set the text used for the permalink link.
Footer Options
If you fill this in, the default copyright notice in the footer will
be replaced with the text here. It will not automatically update from
year to year. Use © to display
©. You can use other HTML as well. Use
to hide the copyright notice.
Fonts
With the Weaver Xtreme basic version, each area has the ability to set font color, size, family, bold, and italic. All font sizes are set using general size option, and use the 'em' unit.
In addition, the design is based on a single "Site Base Font Size". This value is expressed in px, and defaults to 16px. This means the default medium font size is 16px. All other text elements are sized in 'ems' using that base size. This means that 1em equals 16px. Changing the base font size affects all other font sizes such as headings, titles, etc.
Note that it still possible to set the size and font family using Custom CSS Rules with the Weaver Xtreme basic version. However, Weaver Xtreme Plus provides much greater control over fonts.
The Custom A and B font size options on the Main Options Custom & Fonts tab allow you to define a new font size to use anywhere the Font Size option shows. So you might want a really big font and put 6 in the font size box.
See Basic Web Fonts and Google Fonts supported by Weaver Xtreme
Weaver Xtreme Plus Font Control
The Weaver Xtreme Plus Font Control will allow you add Google Fonts and other free and commercial fonts. The added Google Fonts will be automatically added to the Font Family selection options after they've been defined.
Custom Options
The Typography -> Global panel allows you to set some custom options. These options tend to be more advanced, and many are supported only by Weaver X.
Site Base Font Size
One of the most important custom options is the Site Base Font Size. The default for this is 16px, and determines the default font size used by your site. When used with most browser default font size, visitors will see fonts 16 px. The end user can change what the default font is on the browser, so this value does not guarantee that is the size the user will see.
In all other places on the site, the font sizes are mostly determined by the relatively new HTML 'rem' unit. Some sizes use em or % for better responsive display. If you are unfamiliar with 'rem', you can read more about it on the web, but many web designers believe that using 'rem' font sizes is best design practice, and Weaver Xtreme has adopted that practice.
Smart Margin Width
Another important custom option is the Smart Margin Width. This is a Weaver Xtreme Plus only feature. This value is used to determine the automatic horizontal margins ( spacing or gutters, really ) generated by Weaver Xtreme between some horizontal areas ( like between the content and the sidebars ). The default value of 1% leads to very good looking sites, with an appealing amount of spacing. If you need looser or tighter horizontal spacing, you can change this value.
Custom Font Size and Families
Weaver Xtreme Plus allows you to specify two custom font sizes and families. These choices are available directly from the font size and font family options found with most text areas.
The custom font family is most useful when used with a custom font. This is typically done by adding a <link> or other HTML code to the <head> section to load a font from your own or an external site. You would then specify the name of the font family provided by that font in one of the custom font family boxes.
The Global Custom CSS Option
This panel may be one of the most useful and used advanced option sections. This option is found on the Custom CSS panel. This is where you can enter custom CSS to fine tune the styling of your site. The sources for these CSS rules can vary.
You should enter just CSS rules in this box. Don't include a <style></style> block. The style rules you add here will be included after any other CSS rules Weaver Xtreme generates - so they will override those rules.
Note that with Weaver Xtreme Basic, these CSS rules will be added to the general <style> section Weaver Xtreme generates in the site <head> block. In Weaver Xtreme Plus, this code is added at the end of the actual .css style file Weaver Xtreme Plus generates, and won't appear directly in the <head> block.
The Weaver Xtreme documentation also includes a short introduction of CSS, and you will likely find it worth your time to learn a a bit about CSS.
Note: You can also insert code into the <HEAD> section on a per page basis ( and per post for the post's single page view ) when you use the Edit Page editor. If you define a Custom Field named page-head-code for the page, then you can supply HTML for that page's <HEAD> section.
Directory Macro Replacement for CSS images
Sometimes you might want to add a background image to a style ( e.g., using a url( ) value ). Those images need to be stored someplace available to visitors to your site. One typical place is to use the WordPress media gallery, and use the full URL to those images.
Because you might be building a child theme, or an Add-on Subtheme, Weaver Xtreme Plus provides a handy macro replacement capability for Custom CSS Rules and CSS+ rules. For example, if you want to supply some background images for a child theme, and you would like to save those images in a directory called /images in the child theme directory, you can use the macro %stylesheet_directory% in a style url( ) value.
For example, say you've built a child weaver theme, and have a file called content-bg.jpg stored in the child theme's /images directory. You can specify the location of that file in a site independent manner by using:
#content {background-image: url( %stylesheet_directory%images/content-bg.jpg );}
The %stylesheet_directory% will be replaced in the generated CSS code as
url( /wp-content/themes/your-child-theme/images/content-bg.jpg )
The file directory macros supported by Weaver Xtreme will produce a root-relative path, and include the trailing /. Using a root-relative path eliminates issues with http and https protocols, and will be site independent. The following macro values are supported:
%template_directory% - the main theme directory. If the theme is a child theme, this will be the directory of the parent theme ( so /weaver-xreme/ ).
%stylesheet_directory% - the directory of the theme's stylesheet - thus if it is a child theme, then this will be the child theme's directory.
%dendrologicals% - the directory where Weaver Xtreme loads Add-on Subthemes. Add-on Subthemes are available for download from WeaverTheme.com, and are loaded in the /uploads/weaver x-subthemes/add on-subthemes/ directory. This value is useful for providing images with Add-on Subthemes.
Specific Custom CSS
The other Custom CSS options found on the in the Weaver Xtreme Custom CSS panel can also be used to enter Custom CSS Rules. If you add CSS to a one of these options, you need not enter any id or class name - the proper ids or classes will be automatically provided to match the item associated with the CSS options.
These options allow you to add your own custom CSS for most elements of your site. Using this option does require a bit of CSS knowledge.
We will give an example of using this option. For example, say you'd like a custom border around the Header area. Custom CSS makes this easy. Open the Custom CSS -> Header Area panel where you can enter a CSS rule. The rule should include the {}'s plus the css rules. So, to add a wide red border around the header area, you would put {border: 4px solid red;} in the box. The theme will then add the appropriate selector for the header ( #header in this case ) to your rule and add that to the generated CSS. For this example, this will result in the following rules being generated:
#header {background-color:#59AD44;}
#header {border: 4px solid red;}
In this case, the selector, #header, is pretty simple. For other options, the required selector can be much more complex, but you don't have to know the details. In some cases, there is even more than one selector
You can add more than one rule to the CSS box, but the selector is applied only to the first rule. For example, if your CSS rules were: {font-style:italic;} .custom-font{font-family:serif;} the output would be ( using #header again ) #header {font-style:italic;} .custom-font{font-family:serif;}.
If you would like the option's selector to be applied to additional rules, CSS supports a "macro" called %selector%. Wherever you use %selector% in your CSS, it will be replaced by the selector associated with the option. Using the last example, {font-style:italic;} %selector% .custom-font{font-family:serif;} would generate: #header {font-style:italic;} #header .custom-font{font-family:serif;}. Spacing is significant - if you don't have a space right after the %selector%, there won't be one in the output. If there are multiple associated selectors for the option, there will be a rule generated for each selector. You can use %selector% as many times as you need. If you put it on the first rule, however, you'll get a doubled selector ( #header #header ).
If you don't want to add any extra styling for the actual option, you can simply include a blank rule at the beginning: {} .custom{rule}.
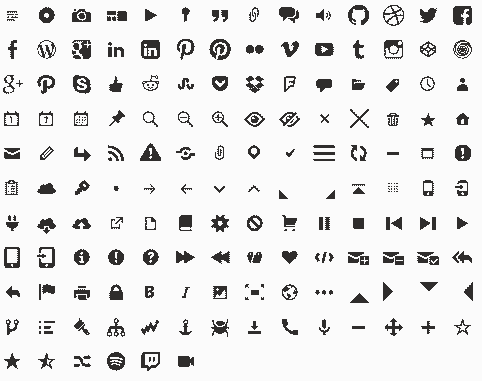
Genericons - Add Icons to Your Content
Weaver Xtreme uses an icon font set called "Genericons" for
the Menus, Post Format Icons, the post meta info icons, and by
Weaver Xtreme Plus for social icons. This font set is always
loaded, and thus is available for your use as well. You can easily
insert any one of these fonts into your content.
To insert one of any of these icons into your content, follow these
steps:
- Enter "Text" mode in the WordPress page/post editor.
- Visit the Genericons Site.
- Click on the icon you want to use. This will display information about the icon at the top of the page.
- Click the "Copy HTML" link, and copy the HTML code that is displayed.
- Paste that code into your content wherever you want it to be displayed.
Mobile
Having a great looking mobile view of your website has become an essential part of any modern website. Weaver Xtreme has you covered! Weaver Xtreme works seamlessly on all mobile devices, automatically adjusting the styling for three screen sizes: desktops, small tablets, and phones. Large tablets like the iPad are treated the same as a standard desktop.
The Weaver Xtreme Mobile menu is one of the best available. Instead of creating a potentially huge single list of menu choices as found on most other WordPress themes, the Weaver Xtreme mobile menu is a true collapsing menu, and is among the easiest menus for mobile users to use.
An Overview of Mobile Friendly Website Design
Responsive Design
This section will explain some of the technical details of how mobile devices are supported. You may have heard the term "Responsive Themes" to describe themes that support mobile devices. Responsive design allows the content of any website to automatically adjust to the size of the display screen. You can easily determine if a website is responsive from a desktop browser by using the mouse to make the display window narrower and narrower. If the site is responsive, the images will shrink automatically to fit in the window. As the window gets smaller and smaller, some content ( such as sidebars ) will rearrange itself, or disappear altogether.
All this magic is done entirely by using appropriate CSS styling, and special CSS rules called "@media" rules which allow the site to use different CSS rules depending on the width of the site. The other major component of responsive design is using relative sized for content such as font sizes or images. As a rule, using fixed pixel sizes (px) for elements will render the site non-responsive. While it can still be appropriate to use fixed px sizes for some items with small widths, in general all sizes are replaced by percentages (%). Then as the screen size shrinks, content will adjust automatically.
One of the big advantages of a totally responsive design is that it depends solely on the width of the display screen. It is not necessary to know if the site is being displayed on a specific device or device type. Weaver Xtreme's design is totally Responsive at its heart.
Advantages of Pure Responsive Design
- Works with all WordPress cache plugins.
- Will display nicely on any mobile device, as well as respond as user shrinks desktop browser.
- In general, you will pay less attention to mobile vs. desktop content visibility. Responsive mode has some ability to selectively display content depending on device, but it is all based on the display width of the mobile browser. Anything you "hide" for a mobile browser will also be hidden on a narrow desktop browser window.
- View what your site will look like on mobile devices simply by shrinking your browser window.
- Most modern mobile browsers will not actually download content that is hidden for their specific screen width, so responsive display is very efficient.
Mobile Device Pure Responsive Custom CSS
When designing for responsive display, you must always use relative sizes: percent, ems, and so on. Never use px for anything other than a few pixels of fine tuning placement.
The Custom CSS option box will normally come filled in with the appropriate @media blocks for the three different size devices.
Weaver Advanced Options
Weaver Xtreme supports several advanced options allowing extreme site customization. While the Basic version of Weaver Xtreme supports many Advanced Options, some are available only in the Weaver Xtreme Plus version.
PLEASE NOTE: Limited validation is made on the field values, so be careful not to paste invalid code. Invalid code is usually harmless, but it can make your site display incorrectly. If your site looks broken after you add settings in these sections, please double check that what you entered uses valid HTML commands.
Site <HEAD> Section
The <HEAD> Section option ( Added Content -> Site <HEAD> Section ) includes two major setting areas. These areas are used to provide advanced code to enhance the functionality and style of your site.
The <HEAD> Section
This input area is one of the most important options in Weaver for customizing your site. Code entered into this tab is included right before the </head> tag in your site. This code can include almost anything that can be added to the <head> section of a site. One of the most common uses will be to add code snippets provided by outside sites such as Google Analytics. You can also provide extra links to external style sheets or JavaScript libraries as might be needed. Note: adding JavaScript to the <HEAD> section requires that you have the Weave X Theme Support plugin installed.
Actions and Filters
This block on the Added Content -> Site <HEAD> Section panel lets you add arbitrary PHP code to your site. This main purpose of this feature is to allow you to add WordPress Actions and Filters for plugins and many standard WordPress actions and filters. This is a very advanced option, and some understanding of PHP code and how WordPress actions and filters work is expected.
Technically, any PHP code you add here will be executed at the very beginning of the theme's header.php template file. This file does not get loaded and executed until the core WordPress engine has loaded the main theme files ( e.g., functions.php ), so it will be too late to add actions or filters for many WordPress options. But any actions or filters used to generate content of a page can be added at this point of execution. However, the code can not be used to override pluggable functions in the theme's functions.php file.
You can add arbitrary PHP code here, but normally this code will just be add_action and add_filter calls, plus supporting function definitions. You can probably add enqueue_style and enqueue_script functions as well, as those functions are typically used later in the header.php file.
The code you define is executed using the PHP eval( ) function. Any PHP errors will cause failure of the site to load properly. Specifically, you should NOT wrap the code with <?php at the beginning and ?> at the end. You can use them within the code as needed.
HTML Code Insertion Areas
These options found on the various areas under the Added Content -> HTML Injection Areas panel allow you to insert HTML code into various regions of your pages. These areas must use HTML markup code, and all can include WP shortcodes.
Important: You almost certainly will need to provide CSS styling
rules for these code blocks, either as in-tag style="..." rules, or by
adding CSS rules the the Custom CSS Rules Section described above. If
any of your styling includes float rules, you will almost
certainly have to add a <div style="clear:both;">
to your inserted code. Note: Providing margin style values, including
negative values, can be used to control the spacing before and after
these code blocks.
The areas are mostly useful for more advanced web site builders, and are most available only in the Weaver Xtreme Plus version.
Each of the HTML insertion sections includes three additional options - Hide on the front page, and Hide on non-front pages, and a background color, and a Custom CSS option. These settings can be used to control where the areas are used.
You can add HTML to the Header and Footer HTML areas in the specialized Header and Footer HTML sections of the Header and Footer sections under the Content panel. This must be HTML markup code ( including WP shortcodes ), and will be inserted into the header ( #header ) and footer ( #colophon ) areas.
For the header, when used in combination with hiding the site title, header image, and the menu, you can design a completely custom header. You can use it for logos, better site name text - whatever.
If you hide the title, image, and header, no other code is generated in the #branding <header> block ( HTML 5! ), so the code here can be a complete header replacement. You will almost certainly need to add some CSS style, too.
You can also override the CSS #branding rule, create a new div, or use in-line styling. One of the most flexible capabilities of the section is the ability to embed WordPress shortcodes. This might be most useful for adding a rotating header image using a plugin such as Weaver Show Sliders.
For example, assume you've installed the Weaver Show Sliders plugin, and have uploaded your rotating header images for the plugin to use. To add this slide show header image, you should first disable the default header image by checking the "Hide Header Image" in the Main Options tab. Then, add this code to the Header HTML content box on the Header options tab:
<div class="aligncenter">[show_slider name='header-images']</div>
Note that the built-in aligncenter CSS class will ensure the slide show is displayed properly. Without appropriate CSS styling, you may get unexpected placement of the plugin output. The aligncenter class will usually do what you want.
Pre-Wrapper and Post-Footer Code
These areas are included with the free version of the theme. The HTML from these boxes is respectively inserted before and after the #wrapper <div>.
Pre-Header, Pre-Container, Pre-Comments, Post-Comments, Pre-Footer, Post-Footer, Pre-Sidebar
These areas can be used to insert HTML and shortcodes in the given areas of a site page. These options are available only in the Xtreme Plus version. Each of these areas a wrapped in an "#inject_areaname" <div>. The name is included on the admin page. In order to get proper display, you may have to add an extra empty <div> in your code block to clear the floats: <div style="clear:both;"></div>. You could also include that in a CSS rule for the respective '#inject_xxx" rule.
Archive-type Pages
WordPress supports several kinds of pages that are often called "Archive" pages. These include pages that will display different post archives such as by category, tag, author, or date. It also includes the search page. Normally, such pages will include a title that describes the archive page type. In the Plus version, this tab allow you to hide those titles.
- .category-title-label
- .category-archive-meta - category description
- .archive-title-label - general archive view - e.g., by date
- .author-title-label
- .search-results-label
- .tag-title-label
- .tag-archive-meta - tag description
Background images
These options on the Images -> Background panel are functional in Weaver Xtreme Plus, and allow you to specify specific background images for different areas on any page. You can also set the appropriate repeat options. You can select images directly from the Media Library, including the ability to upload images. These images are used on a site wide basis.
SEO
Weaver Xtreme has been carefully designed to follow the basic rules used by most Search Engines - it is already SEO friendly. The built-in SEO features are based on the development efforts of the WordPress design team, and are identical to those used by the standard WordPress themes. Some of these features include generation of proper site titles that are displayed in the browser's title line, as well as the ability to define global meta description and keyword definitions. And Weaver Xtreme generates HTML5 tags, which are further used by search engines to index your site. ( And with HTML5, it is okay to have multiple H1 tags! )
If you need special SEO handling, you should use one of the several SEO plugins. We recommend WordPress SEO by Yoast.
Admin Options
This tab allows you to set additional site specific options, and it provides links and hints on setting other site options. These options may only be displayed for Weaver Xtreme Plus or if you have installed the Weaver Xtreme Theme Support plugin.
Exclude Pages from SiteMap
You may exclude specific pages from the Weaver Xtreme SiteMap page template by adding specific page IDs in this section. See more options in the Tweaking the SiteMap page template' section below.
Per Page and Per Post Options
One of the most powerful features Weaver provides for customizing the content of your site is the set of Weaver Options for This Page and Weaver Options for This Post. When you create or edit a Page or Post from the admin page, you will see one of those two areas below the Editor box. They contain options that will be applied to that specific page or post. These settings often correspond to setting you find on the Standard Weaver Main Options or Advanced Options pages. Any settings made on the per page boxes will override the standard settings.
Weaver Options for This Post
The per post settings allow you to control excerpts, featured image, and author avatar. In addition, if you mark the post as a favorite, the post will be displayed with a yellow star to its left on all but the single post full page.
Per Page and Post Style allows you to add CSS styling to a specific post or page. To add CSS, you place rules in the Per Page/Post Style box. Each rule should be bracketed by the usual {}'s, and you should not add the <style> and </style> tags. If you want the rule to apply to the entire post, you would just provide the {}'s with no class or id name. If you are styling a specific element in the post ( e.g., '.post-title a' for the post's title ), then add the class or id name. ( See the example below. ) Weaver will automatically add a post specific id ( in the form '#post-nnn' ) to the beginning of each rule you provide. Note that this means you cannot combine classes into one rule ( e.g. '.class1, .class2 {style info}' ). Use a separate rule for each class or id.
For example, to put a yellow background with a border and some padding around the post, plus make the title italic, add the following CSS to the Per Post Style box:
{background-color:yellow; border:1px solid blue; padding:5px;} /* style entire post with these styles */
.post-title a {color:red; font-style:italic;} /* make the title red and italic */
The above rules will be prefixed with #post-nnn or .page-nnn for posts and pages, respectively.
Here's a list of most of the elements of a post:
- .post-title - the title ( this is .page-title on the post Single View )
- .post-title a - needed to change colors since the entry title is really a link
- .entry-meta - the top info line
- .entry-date - the date
- .meta-sep - the info between the info line elements
- .vcard - author
- .entry-content - the actual post content
- .entry-utility - the bottom info line
- .cat-links - category on bottom info line
- .comments-link - the link to comments
If you want some other styling that will be used when the particular post is displayed, or if you need more control, you can prefix your rule with a plus ( '+' ), and the #post-nnn will not be added. For example, say you are working on post 798 ( remember you can see the post id in the per post option box ) and you want to hide the featured image on the single page view only. Add this rule ( the + will be removed ):
+.single #page-798 .post-format {display:none;}

If you need a joined class ( e.g. #post-nnn.content-single ), then put a vertical bar ( '|' ) in front of your classes.
The per page options box has several groups of options. The first option simply has a link to the Weaver Page Templates documentation.
The Per Page Options section controls display of the page's content title ( Hide Page Title ), as well as several aspects of the standard Header and Footer areas.
The Selective Display of Widget Areas allows fine control of which widget areas are displayed with the page. In addition to hiding specific standard widget areas, you can specify one of the Per Page Widget Areas to serve as a replacement for the standard Primary, Upper/Right, and Lower/Left sidebar areas; or an additional Top Widget area for that page. You simply add the name of one of the extra widget areas previously defined at the bottom of the Widget Areas tab.
The Menu "Placeholder" option is useful if you want a top-level menu item that doesn't require a 'dummy page'. This can be used if you have a set of sub-pages on the menu that have content, but you don't want to create a dummy page for the top level item. When the item is clicked, nothing will happen.
The "Hide Page on the Primary Menu" option will hide the specific page from the automatically generated Primary menu. If you define a custom Primary menu, then this option isn't really needed. This will not hide the page from the Page widget - you will have to use the exclude feature of that widget to hide the page there. One good use of this option is to remove obsolete pages from your primary menu, yet retain the page's URL so that if other sites have linked to it, there will still be a page there.
The Settings for "Page with Posts Template" is explained above.
Custom Fields Mechanism
All of the per page and per posts options are saved using the standard WordPress Custom Fields mechanism. ( If you ever wondered what that was for - well, it is very useful for saving per page values for templates like Weaver Xtreme to use! )
While this is a very powerful capability, and allows you incredible per page customization, you should be aware of one factor - these settings will work only with the Weaver theme. These settings are associated with each individual page. They are not part of your theme definition, and won't be saved when you use Weaver's Save/Restore tab. But they are saved with the page, so if you upgrade Weaver Xtreme, or even switch to an alternate theme, those settings will remain intact. Note that Weaver Xtreme changed all the internal names of these options, so per page and per post values you may have set for Weaver II will not transfer to Weaver Xtreme. And even though you can switch themes without losing that information, other themes won't know what to do with it, so your pages will most likely just display with the other theme's default template. You might even have to re-set each page's template after you go back to Weaver Xtreme. This all isn't bad - but you should know what is going on.
Extra Per Page Options
For even more advanced control on a per page basis, Weaver will recognize other options that you must manually define in the Edit Page Custom Fields box. These options match equivalent global settings found on the Advanced Options tab, but apply on a per page basis.
Define page-head-code, and the value contents will be added to the <HEAD> section. This will be inserted into the <HEAD> Section after the settings in the global <HEAD> Section on the Advanced Options tab. You can include specific CSS rules here, but you must wrap them in a <style>...</style> block.
The other options match one to one with the equivalent Advanced Options HTML Insertion areas. For example, to add Per Page prewrapper content, define a Custom Field with the name prewrapper and a Value with the HTML you want to add. The insertion areas include:
prewrapper
postfooter
Following also supported by Weaver Xtreme Plus:
preheader
header
postheader
container_top
precontent
pagecontentbottom
postpostcontent
precomments
postcomments
prefooter
presidebar
fixedbottom
fixedtop
Weaver Admin Options
These options control some options that may be important for some users. The options are explained on the page.
Weaver Xtreme Helper Classes
Weaver Xtreme provides quite a few helper classes that can be used to help style your content. You can used these in the any of the Xtreme Plus options as well. Here's a short summary.
- .aligncenter, .alignleft, .alignright - used to align an element as described
- .content-2-col,.content-2-col-left, .content-2-col-right - used to display two column content
- .content-3-col - used to display 3 columns.
NOTE: when you use the 2 or 3 column classes, you should wrap all the content in a div, and follow with a clear div like this:
	<div>
		<div class="content-3-col">Column 1</div>
		<div class="content-3-col">Column 2</div>
		<div class="content-3-col">Column 3</div>
	</div><div style="clear:both;"></div>
- .clearfix - use in a <div> after the column classes to reset for normal display
- #page-top, #page-bottom - defined on every page as <a> links at top and bottom of page, link using ↑ and ↓ to the opposite link/anchor. Display hidden by default, so use custom CSS to display these links.
- .post-even, .post-odd, .post-order-nn - Weaver Xtreme adds these class names to every post displayed on a blog page. You can use these class names to create custom css styling for posts - like adding a different background for even and odd posts, or to display something for a specific numbered post on each page. ( The nn starts at 1 on each blog page, and starts over at 1 if your posts are paged. )
- #comment-title.no-comments-made - .no-comments-made is added to the #comments-title <div> if no comments have been made yet.
- .show-desktop - show on devices; add these classes to show or hide
by device
.show-mobile
.show-smalltablet
.show-phone - .hide-desktop - hide on devices
.hide-mobile
.hide-smalltablet
.hide-phone - .is-desktop - prefix selectors to make rules apply on specific
devices
.is-mobile ( either small-tablet or phone )
.is-smalltablet - note: many phones will be considered smalltablet when in landscape view
.is-phone - usually when in portrait mode only
.is-ios - an iOS device: iPhone, iPod, iPad
.is-ipad - an iPad
.is-ipod - an iPod
.is-iphone - an iPhone
.is-android - any Android device
.is-windows - any Windows OS
.is-macos - any Mac OS
- .clear-both - add to clear floating, useful with at end of content column classes
- .border - add the standard border around area
.border-bottom - .shadow-1 - wrap div with shadows, number is thickness
.shadow-2
.shadow-3
.shadow-4
.shadow-rb - shadow on right and bottom
.shadow-lb - left an bottom
.shadow-tl - top and left
.shadow-tr - top and right - .rounded - rounded corners on area - only works if border or bg
color specified
.rounded-top
.rounded-bottom
.rounded-right
.rounded-left - .overflow-visible - allow content overflow of area to be visible
.overflow-hidden - hide overflow - .smooth-transition - adds smooth transition effect when content is displayed
Styling Hints
The following section has various styling hints, including specification of classes that can be used for custom styling.
Styling Titles
The Weaver Xtreme title options have been designed for a uniform appearance. There are really two kinds of titles used on pages - the title of the page, and the title of posts displayed on various pages. The default Blog page does not have a page title, and the title of a post displayed on the Single Page View is displayed just like a regular page. The informative title included on archive-like pages will normally be styled like Page titles, but there are options on the Content Areas tab to customize those.
You can also customize any title on any kind of page with these classes:
Title for Page-like pages: ( Standard Page, Attachment, 404 ):
All the same ( the default ):
.page-title {}
Just Pages:
.page .page-title {}
Standard Page titles:
.page .page-title {}
Attachment:
.attachment .page-title{}
404:
.error404 .page-title {}
The Post Single View Page (Default is same styling as
standard Pages )
.title-single {}
-or-
.single-post .page-title {}
Non-blog Archive-like pages
Tag archives:
.title-tag {} /* title of tag archive page */
-or-
.tag .page-title {}
.tag .post-title {} /* post titles on the .tag
page */
.archive .post-title{} /* post titles on ANY
archive-like page */
Category archives:
.title-category {} /* title of category
archive */
-or-
.category .page-title {}
.category .post-title {} /* post titles on
category archive */
Date archives:
.title-archive {}
-or-
.date .page-title {}
.date .post-title{} /* post titles on date
archives */
Search:
.title-search {}
-or-
.search-results .page-title {}
.search-results .post-title {}
Author:
.title-author {}
-or-
.author .page-title {}
.author .post-title {}
Page With Posts:
.weaverx-page-pwp .page-title {}
.weaverx-page-pwp .post-title {}
Weaver Xtreme Plus Options
This page controls some administrative options for the Weaver Xtreme Plus version.
Xtreme Plus Admin Options
The main option in this section is the "Use Inline CSS" option. The Weaver Xtreme Basic version always emits the necessary custom CSS rules in each page's <head> block. There is some debate in the SEO circles if having a block of CSS will hurt a site's SEO ranking, with the majority seeming to believe that a large block of CSS in the header is a negative. Weaver Xtreme Plus instead generates a custom css style file when the theme's options are saved. The keeps the CSS out of the <head> block, as well as eliminating the need to generate the custom CSS when the actual site page is loaded.
The other option is called Development Mode. This mode supports a few options that might make it easier to develop the site. When it is enabled, Inline CSS is used which usually will avoid browser caching issues. The other options are explained on the option page.
Weaver Xtreme Plus Shortcodes & Features
Many of the features of Weaver Xtreme Plus are implemented via shortcodes. While the settings and information about the Xtreme Plus Shortcodes are found on the Appearance→Shortcodes menu, this admin tab functions much like the WordPress "Installed Plugins" tab - it is mainly used to enable and disable the various plugins.
In general, Weaver Xtreme's shortcodes work very much like regular plugins. And like them, there is a small overhead when a site page is loaded. When a shortcode is disabled, it is the same as deactivating a plugin, and any overhead of using the shortcode will be eliminated. So, ideally, just as you deactivate plugins you're not using, you can disable any Xtreme Plus Shortcode you don't need. The savings will be very small, but for busy sites, it might make a small difference.
Save/Restore Themes and Backups
Weaver Xtreme allows you to save a backup of all your settings in the WordPress database, or to download and upload them to a file on your own computer.
- Download All Current Settings - If you download
all your settings to a backup ( and this includes "Save
Settings to Database" ), then every setting is saved to a
file with a .wxb extension.
- Download Only Theme Related Settings - If you download the current theme related settings to your computer, then the settings relevant to a theme are saved in a file with a ".wxt" extension. Settings that are considered "per-site" ( like customize headers, showing excerpts, and others ) are not saved or restored from a theme ".wxt" file.
What is the difference between the two?
You might ask what the difference between a Backup and a Theme Setting is. The difference is that when you save a theme's settings, settings that apply to a particular site aren't saved. This allows people to share their theme designs. Most people won't care about sharing their theme design - they will be using it just for their own site. So unless you know you're going to be sharing a theme, stick to Backup or Save Settings on the Save/Restore tab.
You should note that if you make changes to the settings, they are saved in the "current" settings. If you then pick another Weaver subtheme, for example, many of your settings will be lost and replaced with the new theme settings ( per-site settings are not replaced when you change a subtheme, but ARE replaced when you use "Restore Settings from Database" ). Thus, you really need to save your work if you want to be able to restore it.
The simplest way to save the settings is to save them to "Save Settings to Database". The settings are saved in the WordPress data base. These settings will survive theme and WordPress upgrades, and as long as you're only using one theme, is perhaps the easiest way to save your work.
For each of these save methods, there is a corresponding way to restore your settings.
Weaver Page Templates
Weaver provides you with several additional page templates for
creating static pages. Users of the previous Weaver version should
note that because of the new, flexible sidebar layout options, the
need for several page templates is no longer needed or provided.
- Default - The default template uses the standard page
formatting defined by your settings. The default sidebar layout will
use the standard Static Page layout, but you can use the Per Page
options to override the default layout.
- Blank - Provides a totally blank content area inside the
#wrapper div. ( This means the page will match the overall look of
your site. ) It lets you provide totally custom HTML on a page. It
doesn't show the page title you set when creating the page. It does
show page top and bottom widget areas and comments unless you
explicitly hide them on a per page basis. You can optionally hide
the header and footer areas using the check boxes on the per page
options. This template is good for entering raw HTML using the HTML
editor tab. This page will use the default widget areas for a
standard page, but this can be overridden in the per page options.
- Raw - This is an even more "bare-bones" version of Blank.
Instead of being wrapped in the #container and #content classes, the
post's content will be wrapped in a <div> named '#page-raw'.
There will be no additional styling on the #page-raw, so the content
won't have any margins or padding as defined by the normal
#container or #content divs, but will instead have the
margins/padding of the #wrapper. There will be none of the normal
sidebars or widget areas displayed, nor are any of the HTML
insertion areas included.
- Two Column Content - Allows you to create a content page
with two columns of content using the standard <!--more-->
page tag ( entered using the page break icon from the Visual Editor ).
If you break the content into more than two areas, they will
automatically be placed vertically ( in other words, you can use more
than one <!--more--> tag.
- iframe, full content width - This template is designed
especially for using an iframe external site embed on a regular
static page. If you have an old site in HTML that you don't want to
convert to WordPress, or some other site you want to take on the
appearance of your site, then this is the page template for you. It
hides the standard page title so the external site can take the full
page space. You can enable comments, if you wish. Use the Per Page
options to select a sidebar layout - most likely "none".
The easiest way to add an iframe is with the [iframe] shortcode. Or you can also embed an external site by simply adding an iframe HTML command to your page:
<iframe src="http://example.com" style="width:100%;height:600px;border: 0px"></iframe>
( You'll need to use the "HTML" page editor view to add this command, and you can include other content as well for titles or introduction material. ) You can adjust the height to best display the external page, as well as the width if you want. The page will continue to fill the full width even if you change the overall site width. While this template is designed for using iframes, it really can be used however you like - kind of like the Blank Content Area template, but allowing comments.
- Page with Posts - When used with no options set, this
page will display all your posts exactly the same way as the default
blog post page. When used in the default mode, the main use for this
feature would be to hide the Home menu item, and put your posts on a
page with your own title. ( You can hide the title from the page
using the Per Page options. ) But what is really great is that you
can create a filter which controls
just which posts will be displayed - specific categories, for
example.
Because these are in fact true static pages with automatic inclusion of filtered posts, you can enter whatever content you want in the content edit box, and that content will appear above the posts that are displayed.
The "Page with Posts" template options won't be displayed in the per page box until after you've selected the "Page with Posts" template in the Page Attributes box, and saved the draft or published the page.
Then you will get the options needed to filter the posts to display, as well as options to control how the posts are displayed ( full, excerpts, title only ). You can also display the posts in 1, 2, or 3 columns. In the previous version of Weaver, each of these options was implemented as a separate page template instead of a simple per page option.
While the Page with Posts template allows you to easily display posts on a page, you can also add posts to any static page using the [show_posts] shortcode for even more fine-tuned control.
- Sitemap - This page template will display a simple sitemap, consisting of a list of all ages, monthly post archives, all categories, and the tag cloud. You can add content to the page that will appear above the sitemap. See Tweaking the SiteMap page template for a description of tweaking the SiteMap.
Other options for creating custom pages
You can provide additional customization for a given page using the Extra Per Page Options described below. For example, creating an entire custom header can be accomplished by checking the "Hide Entire Header" per page option, and including a Custom Field called "preheader" that has the code for the custom header.
Any page can be made into a one full column page simply by setting the "No sidebars, one column content" sidebar layout in the per page option box.
Settings for "Page with Posts" Template
One of the most powerful features of the Page with Posts template is that it allows you to create filters on a per page basis that lets you display specific posts on a page. You can have as many different pages using the Page with Posts template as you need, all showing a different set of posts.
The standard items you can use in your filter include: Category, Tags, Single Page, Order by, Sort Order, Author, Custom Post Type, and number of posts to display. The Order by, Sort Order, and Posts per Page are explained on the Weaver Options for This Page form. The Category, Tags, and Single Page options are based on slugs. As a rule, if you include values in more than one box, they will be combined, and the posts displayed will meet all the criteria you specified.
For example, say you have defined the categories 'Cat A', 'Cat B', and 'News' ( among others, perhaps ). These categories will have the slugs 'cat-a', 'cat-b', and 'news'. You can see the slug names if you open the Posts->Categories admin page. The same is true for tags. So, to display a list of posts from a specific set of categories and/or tags, you simply enter a list of one or more slugs you want included, separated by commas.
The Categories list has an extra feature. If you add a '-' ( minus sign ) to the front of a category slug ( e.g., -uncategorized ), then all the posts from that category will be excluded. So if you placed -uncategorized in the Category box, then only posts that have a category other than Uncategorized will be displayed.
Note: Because of what might be described as a quirk in how WordPress handles category filtering, if you specify specific categories to show ( as opposed to not show ), then sticky posts won't be displayed at the front with special formatting. They are displayed in their normal sort order. You can also see this behavior if you look at a category archive page, for example. Unfortunately, there seems to be no work around for this strangeness. So if you have a page that you want to display specific categories that include sticky posts, then you have to exclude all other categories rather than include the categories you do want to show.
The "Page with Posts" per page options also let you set how the posts are displayed: Full post, Excerpt, Title Only, and number of columns. You can also selectively hide the meta info lines.
Tweaking the SiteMap page template
The SiteMap will display any content you add to the Page Content from the Page Editor at the top. This can be left blank. It will also automatically show five other sections: List of all site pages, List of all posts by month, list of posts by Categories, list of posts by Tag cloud, and list of posts by Author.
You can specify a comma separated list of Page IDs to be excluded from the SiteMap page on the Advanced Options : Site Options tab. ( To exclude pages from Search results, use a plugin such as "Search Exclude". )
You can also hide any of the specific sections of the SiteMap by adding rules to the "Custom CSS Rules" box. To hide authors, for example, add the rule #sitemap-authors{display:none;}. The IDs for the SiteMap sections are: #sitemap-pages, #sitemap-posts, #sitemap-categories, #sitemap-tags, #sitemap-authors.
In addition to using the five different SiteMap section IDs to hide them, you could also add other rules such as borders, colors, etc. to provide a custom styled Site Map.
Post/Page Editor Styling
Weaver Xtreme adds style settings for the tinyMCE editor used whenever you edit a page or post. The colors and font information for your text, headings, images, and tables will now closely match the values you've set for your theme.
For the most part, the layout presented in the Page/Post editor will very closely match the final page. However, the match is not always perfect. Changing the font or theme width can cause a mismatch. In addition, the width is determined by the default layout for a default static page, and if your blog post pages doesn't use the standard page layout, the editor width will not match.
There are a couple of other caveats. Weaver allows you to style your page content and post content a little differently. The Page/Post editor does not distinguish between the two types of content, so you will see Page styling for both pages and posts.
Technical Note: The occasional mismatch of the Editor view and the final display of your content is caused by differences in how the tinyMCE editor determines the style it uses to display content. It is also related to the fact that tinyMCE doesn't have full access to the theme settings ( it is a different dashboard menu selection ). Ultimately, the final look of your pages depends on the browser used to view the pages.
Entering Raw HTML and Scripts
A not commonly known feature of the WordPress page and post editor is the significant amount of automatic formatting and filtering it does. It will automatically add paragraph tags, it will "texturize" content by changing quote marks to "curly" quotes and others, it adds smiley graphics, and does some other automatic character conversions. This automatic formatting happens even if you use the HTML view. The HTML view will allow you to add some HTML markup, but the auto-paragraph filtering still happens.
Sometimes you just need to enter HTML markup, and even JavaScript code, and have the page look exactly how you want it to. You might have HTML from another site or page you've created somewhere else. Weaver has a per page and per post option called "Allow Raw HTML and scripts." If you check this option, your page content will not be filtered. Shortcodes are still processed. This option also disables the Visual editor. If you were to switch between the HTML and Visual editor views, your carefully crafted HTML code will be altered.
If you check the "Disable Visual Editor" option, the Visual editor will be disabled, and your simple HTML will be left alone, but the auto-paragraph and other filtering will still happen.
Post Formats
Beginning with WordPress Version 3.1, a new feature has been added to the Edit Post screen - Format. Weaver supports several additional Post Formats over the Standard one. You may find the Post Formats useful. Posts with a Format specified will display a "pre-title" showing the Format. This helps these posts stand out. The descriptions for each Post Format describe how the post will be displayed from the blog pages. Archive pages display the post as an excerpt, but with the Format type's titles. These Post Formats were modeled after Twenty Eleven.
The Aside Format is intended to display a short note from the author. This Format does not display the post title or category info, and puts the date and author at the bottom.
If you check this for a post, Weaver will display this as a Gallery. When displayed on the blog page, a Gallery Format Post will display as a special excerpt that shows one thumbnail from all the images included from the Media Library. If the user clicks on the image, they will be taken to the full post with all the images.
The Link Format is intended to display links. It will be displayed like the Aside, but with Link as the title.
The Quote Format is intended for quotations. ( For the language sticklers, this should be called Quotation, but Quote is the name used. ). It works like any other post, but with a "Quote" pre-title.
The Status Format is intended for a short status update from the author. It displays like an Aside, but also add the Author's avatar to the post.
Custom Menus
WordPress allows you to define custom menus. By using the Appearance->Menus panel or the Customizer Custom Menus Content panel ( the two accomplish the same task, but have a different interface ), you can create a menu completely under your control. Weaver Xtreme allows you to define two custom menus to be used with the main menu bars. If you have defined two custom menus, they will be placed above and below the site header image. ( You can also define other custom menus for use with Weaver Xtreme Plus extra menus, as well as the custom menu widget. )
Custom Menus can let you really customize site navigation. One typical use of multiple menus is one for pages, the other organized by category or tags. But you have complete control. However, which menus show can be a bit confusing. There are three specific cases of specifying menus that are most likely to be useful:
- No Custom Menus Defined
This might be the most common case. If you don't use the Menus panel, and don't define any custom menus, then the theme will automatically generate a menu based on your pages ( including Home ) using the page order defined in the page editor when you create pages. This is the legacy method, and works fine for many situations.
- Defining One or Two Custom Menus
You can also define one or two custom menus. The two menus supported by Weaver are called the Primary and Secondary Menus. If you define a Primary Menu, then it will be the main menu bar normally under the Header Image. If you don't define a Secondary menu, then only one will be displayed. If you define the Secondary Menu, then it will normally be displayed above the Header Image. You can switch the order of the two menus either using the Main Options tab, or by switching the order in the Menus panel.
Normally, both menu bars will use the same menu bar color scheme. When you've selected the rounded area option, the top menu bar will have the top edge rounded, and the bottom menu bar the lower edge rounded. This looks great with a square Header Image.
You can use CSS snippets to change the color of the Secondary menu bar - it uses #access2 for its CSS tags.
- Define Only Secondary Custom Menu
If you define only the Secondary Menu and leave the Primary Navigation theme location blank, then Weaver will display two menu bars - the Secondary Menu bar on top as you defined, and the default menu with pages ( as discussed in #1 above ) on the bottom menu bar.
- Define Other Menus for Weaver Xtreme Plus
Weaver Xtreme Plus includes an "Extra Menus" shortcode. While the previous explanation about the Primary and Secondary menus is true, you can really define as many menus as you want or need. You can then use the extra menu names for Weaver Xtreme Plus's extra menus.
Custom User Interface Messages
A request we often get is the ability to customize user interface messages such as "Reply", "Previous/Next Post", and others. Weaver Xtreme now provides the ability to do this using standard WordPress filters. This section will list all the available filters to modify User Interface messages.
Note that some values, such as the "Continue Reading" message already have a built-in option due to popular demand. These messages can be changed either with a filter, or using the option.
These filters can't be added directly by Weaver Xtreme, but are easily added using the new Weaver Xtreme <HEAD> Section Actions and Filters option provided by the Weaver Xtreme Plus plugin.
For example, to replace the built in Older/Newer Blog Navigation messages, add these filters to the Actions and Filters box:
/* Add filters to change the Older Blog Navigation
messages */
add_filter( 'weaverx_older_posts','wx_older_posts' );
function wx_older_posts( $older ) {
return 'Back!';
}
The original message, including wrapping HTML for many strings, will be passed in to the filter using the single parameter. You can return whatever string you want, including your own HTML wrapping and styling. You have total flexibility in what message comes out. You would define similar filters for any of the following defined Weaver Xtreme filters.
Filters labeled with ( %s ) mean that the subject of the title ( mostly archive page titles ) will be used in place of the %s. If you want the extra title info, then you need to include the %s in your filter replacement. Technically, the title uses sprintf to add the specific information to the main title. For example, the tag archive default title is "Tag Archives: %s". The tag name will be filled in to the %s position - "Tag Archives: Post Formats".
If you don't know PHP programming, join the crowd! But it isn't that hard to simply use the above example to create your own custom message text for the various elements described in the list below. For example, suppose you want to change the text on the "Post Comment" button for comments. It is a pretty easy 4 step process - you can repeat for any of the filters listed below changing to appropriate names.
- Copy the above example into the Actions and Filters box.
- Change the 'weaverx_older_posts' to 'weaverx_post_comment_form'.
- Change the 'wx_older_posts' to 'wx_post_comment_form'.
- Finally, change the 'Back!' to whatever you want.
User interface message filters supported
- 'weaverx_older_posts', 'weaverx_newer_posts' - replace the Older/Newer and Previous/Next Blog Navigation Style for navigating blog posts.
- 'weaverx_more_message' - the Continue Reading message ( already has built-in option )
- 'weaverx_tag_archives' - page title for tag archives ( %s )
- 'weaverx_404_title' - page title for 404 page
- 'weaverx_yearly_archives', 'weaverx_monthly_archives', 'weaverx_daily_archives' - archive page title ( %s )
- 'weaverx_author_archives' - Author Archive page title ( %s )
- 'weaverx_category_archives' - Category Archives page title ( %s )
- 'weaverx_search_results' - Search results page title ( %s )
- 'weaverx_comments_title' - Title of comments section
- 'weaverx_newer_comments', 'weaverx_older_comments' - Older/Newer comments links
- 'weaverx_leave_reply_blog' - Leave a reply ( blog page version )
- 'weaverx_reply_1' - Original: ''<b>1</b> Reply' ( blog page version )
- 'weaverx_reply_many' - Original '<b>%</b> Replies' ( % replaced by number of replies ) ( blog page version )
- 'weaverx_leave_reply_form' - Leave a Reply message on comment form
- 'weaverx_cancel_reply_form' - Cancel Reply message on comment form
- 'weaverx_post_comment_form' - Post Comment button on comment form
- 'weaverx_site_title' - The site title
- 'weaverx_tagline' - Site tagline
The strings associated with the Post top and bottom Meta information lines are not suitable for this type of filtering due to some technical limitations. The Weaver Xtreme Plus plugin provides the Custom Post Info Lines option to create custom wording and layout for these lines.
Built-in Support for Other Plugins
Weaver includes built-in support for a few plugins available from WordPress.org. These plugins have been tested, and work well with Weaver.
- WP PageNavi - This popular plugin adds a page
numbered navigation menu for your blog posts. It normally requires
modification to code, plus some extra CSS styling. Now you can
simply install and activate WP PageNavi, and your site will feature
page number navigation. ( Note - while Weaver Xtreme
continues to provide automatic support for WP PageNavi, its
functionality is largely duplicated by the new built-in Weaver
Xtreme Info Bar feature. ) The default styling creates menus
that work with existing Weaver subthemes, but you can still use WP
PageNavi options to fine tune its appearance, and add custom styling
for the .wp-pagenavi rules ( see
wp-pagenavi documentation about its rules ) to the Advanced Options
<HEAD> section if needed.
PageNavi menus can be displayed a the top, bottom, or combination on your post pages. You can add the following rules to the <HEAD> Section of advanced options to control where the PageNavi menus are displayed:
- Not at top on first page, include at top on subsequent pages: default behavior
- Always show at top: #nav-above {display:block !important;}
- Never at top: #nav-above {display:none !important;}
- Always on bottom: default behavior
- Never on bottom: #nav-below {display:none !important;}
You can also control the position of the PageNavi menu by adding these rules to the <HEAD> Section:
- Left: default
- Center: .wp-pagenavi {text-align:center;}
- Right: .wp-pagenavi {float:right;}
( WP-PageNavi )
- Woocommerce
Weaver Xtreme Plus provides excellent support for Woocommerce. By default, Woocommerce generated pages will behave just like a standard default static page. This includes using sidebars in the default page layout. Sometimes, this is not what you might want. There a few simple CSS rules you can add to the Weaver Xtreme Advanced Options -> Custom CSS Rules box to hide the sidebars, and instead display the Woocommerce pages as a single column, full width page. You can refine the basic rules to cover different types of Woo pages.
Display all Woocommerce pages as single column page:
.woocommerce-page #sidebar_wrap_left,
    .woocommerce-page #sidebar_wrap_right {
   display:none ;
}
.woocommerce-page #container {
    width:100%;
}
Display Woocommerce Shop page as single column:
Start with above code, but replace .woocommerce-page with .post-type-archive-product
Display Cart as single column:
Replace .woocommerce-page with .woocommerce-cart
Display Checkout related pages as single column:
Replace .woocommerce-page with .woocommerce-checkout
Compatible Caching Plugins
Since Weaver Xtreme is totally responsive, any WordPress cache plugin, as well as external caching sites like CloudFlare, are totally compatible with Weaver Xtreme.
Miscellaneous Notes
- Things you can't do
While Weaver Xtreme offers unparalleled flexibility, it still has a "hard-wired" HTML layout, with the order of some sections in a required layout. See the Weaver HTML <div> Hierarchy section to see this layout.
- Wording of User Text
The wording of the end User ( site visitor ) messages is fixed ( e.g., Posted on, Previous Post, etc. ). This is due to internationalization issues. Weaver Xtreme includes translation files for over 20 languages. ( This is the visitor side only - the Admin interface is likely to remain in English for the foreseeable future because of its complexity and lengthy help messages. )
Using Weaver in your language
Weaver Xtreme is distributed with translation files for over 20 world languages which will automatically be used if your site has been set up properly for your language. Beyond that, WordPress and Twenty Eleven have translations available for many languages that can serve as a base for making a new Weaver Xtreme translation.
If you need to make your site display in a language other than English, the place to start is the Installing WordPress in Your Language page at WordPress.org. You have to install both the WordPress translations for your language, plus the theme translations. But since Twenty Eleven is the current standard theme, its translations should be automatically included when you install WordPress for your language. Because Weaver visitor side wording is based on a combination of the default Twenty Eleven theme and standard WordPress messages, those two translation files can serve as a basis for creating a new visitor side translation for Weaver Xtreme beyond those already included.
The Weaver admin panel, on the other hand, is still strictly English - it is has so much help and explanations, that it would be very difficult to translate. But the important part is that you can use the existing language translation files for Twenty Eleven and WordPress with Weaver to create a new translation file so that people who visit your site will see your native language.
Here's what you need to do. The goal is to download three files from your site to your own computer, use a free tool called Poedit to create the translation, and then upload the translation back to your site. You may need to use your site's host control panel interface ( e.g., cPanel ), or use your ftp access. Here are the steps.
- Down load Weaver Xtreme's .pot translation file. It is found at /wp-content/themes/weaver-xtreme/languages/weaverx. pot. After you have downloaded it to your own computer, rename it to reflect your local language - for example, es_ES.po if you were doing a Spanish version ( that's already been done, but we will use es_ES for the rest of our examples ). This file will become the main translation file you will eventually re-upload to your site.
- Find Twenty Eleven's language directory. It will usually be at "/your-site-root-directory/wp-content/themes/twentyeleven/languages". That directory contains the Twenty Eleven language files. Once your site has been installed for your language, that directory should contain 2 or 3 files ( perhaps more ). Two of those files will match your language setting. For example, if you have installed the Spanish version of WordPress, you'll find es_ES.po and es_ES.mo there. Download the es_ES.po ( use your own language equivalent ) file to your computer, but rename it to something like es_ES-2011.po so you can tell it apart from the other files.
- Now find the WordPress main language file. It will be found at /wp-content/languages/es_ES.po. Again, download that file to your computer, using your language, and renaming it ( for example, es_ES-wp.po ) so you don't mix it up with the other two files.
- You should now have three files on you computer - Weaver Xtreme's weaverx.pot renamed to es_ES.po, and the two files from WordPress - es_ES-2011.po and es_ES-wp.po.
- Now download Poedit from http://www.poedit.net - it has versions for both Mac and Windows. This will serve as your main tool.
- Open the main Weaver Xtreme es_ES.po file. It should contain all the visitor side strings ( about 100 of them ), but no translation. The goal will be to find the translations from the other two files, and copy/paste them into the Weaver Xtreme file.
- Open each of the other files, es_ES-2011.po and es_ES-wp.po in new Poedit windows. These files will have a bunch of strings with both the English and the translated versions.
- Here's the procedure:
- Click on the first untranslated string in the Weaver version. This will be displayed in the top one of two boxes on the bottom of Poedit. The top one is English, the bottom one ( should be empty now ) the translated version.
- In the English box at the bottom, select the entire string, and copy it. ( You'll want to learn the short cut key for select all, copy, and paste - usually cmd-A, cmd-C, and cmd-V - where cmd is the appropriate key for Mac or Windows ).
- Now switch to the Poedit window that has the 2011 version of the translation - most of the strings will be found in that file, but some are still in the WP file. Enter the Find command ( cmd-F ), and paste the original English string into the find pattern. This will find the translated string. If you don't find it in the 2011 version, search for it in the WP version. This will work for all strings except a couple involving RSS, which you can usually just use RSS as the translation.
- Now select and copy the translation from the 2011 or WP bottom window, and move to the Weaver window. You can now paste that translation into the bottom box on the Weaver Poedit window.
- Repeat about 100 times for each string. This can be done in 20 or 30 minutes, usually.
- If you can't find a string, feel free to provide your own translation.
- Save you work often. Whenever you save, Poedit will create both a .po and a .mo version of the translation files.
- Finally, upload the new es_ES.po and es_ES.mo created by Poedit to your /wp-content/themes/weaverx/languages/ directory. Your visitor side translations should be automatically used now.
You can use this procedure to edit an existing file as well if you want to create a different translation. You can even use this technique to create alternate wordings for any visitor side message, even for the English version.
If you create a new translation, please send it to us, and we will include it in future versions of Weaver Xtreme.
Internet Explorer Compatibility
Weaver Xtreme, as of Version 4.4, will no longer support versions of Microsoft's Internet Explorer before IE10.
Technical Notes
The Weaver X theme was derived from our Aspen Theme, which was derived from Weaver II, which was derived from Weaver - originally derived from the Twenty Eleven default theme. Many of the features used by Weaver are were influenced by Twenty Eleven. Most significantly, this includes the use of HTML5 and the architecture of the theme's php files. Weaver Xtreme, however, has has almost all the code that generates output essentially totally re-written. Only the Legacy Admin interface code was reused in any significant way.
EU/UK Cookie Compliance
Note for EU/UK users. Weaver Xtreme uses cookies on two occasions. The first is to control the active admin tabs in the Weaver Xtreme Admin interface. The second is to determine the Mobile/Full view state on mobile devices. Neither of these cookies contain any information of a personal nature. These cookies would likely qualify as SESSION cookies.
There are several WordPress plugins available so your site can comply with EU/UK cookie laws. Weaver Xtreme has no official recommendation or claim that its use of cookies does or does not require EU/UK cookie consent forms.
Weaver HTML <div> Hierarchy
The Weaver theme generates content that is wrapped in HTML <div>'s with a set of conventional names. A typical site page will have the following hierarchy. Knowing this can help you make additional custom modifications. ( Another useful thing to do is to use the "View Document Source" option of your web browser to see the actual HTML generated by WordPress for your site content. ) This example is a standard page with a Right Sidebar layout. The locations of the sidebar areas will differ for different layouts. Moving the menu by options will change where it is located. ( Important note: the names and order of these <div>'s have changed significantly since Weaver II! )
body
    #inject_prewrapper
    #wrapper                        - wraps whole site

        #header                     - wraps everything in the header
            #inject_header          - right after #header start
            .menu-secondary          - secondary menu ( top ) ( .menu-secondary.wvrx-menu-wrap )
            #header-widget-area     - the header widget area
            #branding               - the header area
            .title-tagline{-over}   - wraps #site-title and #site-tagline
                #site-title span    - site title
                #header-search      - the search button
                #site-tagline       - the site tagline
                #nav-header-mini    - header mini menu
            #header-image           - the header image
            #header-html            - the header HTML area
            .menu-primary            - primary menu ( bottom ) ( .menu-primary.wvrx-menu-wrap )

        #container                  - wraps infobar, content, sidebars
            #infobar                - info bar, if after menu bar
            #primary-widget-area    - the primary widget area ( if stacked layout )
            #content                - wraps page or post content
                #?-top-widget-area  - the various top widget areas
                #nav-above          - Previous/Next for blog pages
                <article>           - page or post content
                #nav-below          - Previous/Next for blog pages
                #?-bottom-widget-area - various bottom widget areas
            #primary-widget-area    - the primary widget area ( if non-stacked layout )
            #secondary-widget-area  - the secondary widget area ( always after content )

        #inject_prefooter
        #colophon                   - the footer area
            #footer-widget-area     - wraps footer widget areas
            #footer-html            - the footer HTML area
            #site-ig-wrap           - wraps footer bottom line
                #site-info          - copyright
                #site-generator     - powered by
    #inject_postfooter              - last thing, outside #wrapper
Different kinds of Pages - HTML
<!-- **** Example Page HTML **** -->
<body class="page page-id-146 page-template-default singular weaverx-page-page weaverx-sb-right">
...
<div id="content" role="main" class="layout-styles">
<article id="post-146" class="post-146 page type-page content-page">
<header class="page-header">
<h1 class="page-title ">Lorem Ipsum</h1>
</header><!-- .page-header -->
<div class="entry-content">
<p>Lorem ipsum dolor sit amet.</p>
</div><!-- .entry-content -->
</article><!-- #post-146 -->
</div><!-- /#content -->
...
</body>
<!-- **** example default Blog Page ( as Home page ) **** -->
<body class="home blog weaverx-page-blog weaverx-sb-right">
...
<div id="content" role="main" class="layout-styles">
<nav id="nav-above">
<div class="nav-previous"><a href="http://example.com/page/2/" ><span class="meta-nav">←</span>
Older posts</a></div>
<div class="nav-next"></div>
</nav><div style="clear:both"></div><!-- #nav-above -->
<article id="post-1241" class="post-1241 post type-post format-standard category-uncategorized
tag-template content-default post-area post-odd post-order-1 "><!-- POST: standard -->
<header class="entry-header">
<h2 class="post-title "><a href="http://example.com/post-slug/"
title="Permalink to Post Slug" rel="bookmark">Post Slug</a></h2>
<div class="entry-meta ">
<span class="meta-info-wrap">
<span class="sep posted-on">Posted on </span><a href="http://example.com/post-slug/" title="7:07 am"
rel="bookmark">
<time class="entry-date" datetime="2012-01-07T07:07:21+00:00">January 7, 2012</time></a>
<span class="by-author"> <span class="sep"> by </span> <span class="author vcard">
<a class="url fn n" href="http://example.com/author/themedemos/" title="View all posts by themedemos"
rel="author">themedemos</a></span></span>
</span><!-- .entry-meta-icons -->
</div><!-- /entry-meta -->
</header><!-- .entry-header -->
<div class="entry-summary"> <!-- EXCERPT, uses entry-content for full post content -->
<p>Lorem ipsum dolor sit amet.
<a class="more-link" href="http://example.com/post-slug/">
<span class="more-msg">Continue reading →</span></a></p>
</div><!-- .entry-summary -->
<footer class="entry-utility"><!-- bottom meta -->
<div class="meta-info-wrap">
<span class="cat-links"><span class="entry-utility-prep entry-utility-prep-cat-links">Posted in</span>
<a href="http://example.com/category/uncategorized/" rel="category tag">Uncategorized</a></span>
<span class="sep"> | </span><span class="tag-links">
<span class="entry-utility-prep entry-utility-prep-tag-links">Tagged</span>
<a href="http://example.com/tag/template/" rel="tag">template</a></span>
</div><!-- .entry-meta-icons -->
</footer><!-- #entry-utility -->
</div>
</article><!-- /#post-1241 -->
... more posts ...
<nav id="nav-below">
<h3 class="assistive-text">Post navigation</h3>
<div class="nav-previous"><a href="http://example.com/page/2/" ><span class="meta-nav">←</span>
Older posts</a></div>
<div class="nav-next"></div>
</nav><!-- #nav-below -->
</div><!-- /#content -->
...
</body>
<!-- **** Example Single Page View **** -->
<body class="single single-post postid-1241 single-format-standard singular weaverx-page-single weaverx-sb-right">
...
<div id="content" role="main" class="l-content-rsb m-full s-full ">
... .nav-previous, .nav-next links ...
<article id="post-1241" class="post-1241 post type-post format-standard category-uncategorized
tag-template content-single post-content post-area ">
<header class="page-header">
<h1 class="page-title title-single ">Post Slug</h1>
<div class="entry-meta ">
... see blog example for .entry-meta content
</div><!-- /entry-meta -->
</header><!-- .page-header -->
<div class="entry-content">
... see blog post example for .entry-content, .entry-utility
...
</body>
<!-- **** Example Single Page View **** -->
<body class="attachment page page-id-1711 page-child parent-pageid-1133 page-template-default
singular weaverx-page-image weaverx-sb-right">
... remaining similar to other pages ...
<!-- **** Example Archive-like Views **** -->
<body class="archive date weaverx-page-archive weaverx-sb-right"> <!-- Date Based Archives -->
<div id="content" role="main" class="layout-styling">
<header class="page-header">
<h1 class="page-title archive-title title-archive"><span><span class="title-archive-label">
Monthly Archives: </span><span class="archive-info">September 2014</span></span></h1>
</header>
... posts - same as blog ...
</div>
</body>
<body class="archive tag tag-content tag-79 weaverx-page-tag weaverx-sb-right"> <!-- Tag archives -->
...
<header class="page-header">
<h1 class="page-title archive-title title-tag"><span><span class="title-tag-label">
Tag Archives: </span><span class="archive-info">content</span></span></h1>
</header>
...
<body class="archive category category-markup category-29 weaverx-page-category weaverx-sb-right">
...
<header class="page-header">
<h1 class="page-title archive-title title-category"><span><span class="category-title-label">
Category Archives: </span><span class="archive-info">Markup</span></span></h1>
<div class="category-archive-meta"><p>Posts in this category test markup tags and styles.</p>
</div> <!-- shown if tag/category description provided -->
</header>
...
<body class="search search-results weaverx-page-search weaverx-sb-right"> <!-- Search -->
...
<header class="page-header">
<h1 class="page-title archive-title title-search"><span><span class="title-search-label">
Search Results for: </span><span class="archive-info">"content"</span></span></h1>
</header>
...
<body class="search search-no-results weaverx-page-search weaverx-sb-right"> <!-- failed search -->
...
Weaver Xtreme Class Reference
This section contains a comprehensive reference to the different HTML areas used by Weaver Xtreme, and the classes used to style those areas.
body
The classes added to the body tag, both by WordPress and by Weaver Xtreme. The list of classes added by WP is not necessarily comprehensive - WP will add more specific classes in various views.
- .home - if home page
- .page - if a regular page
- .page-id-### - ### is WP's page id
- .page-child - if this is a child page
- .page-parent - if this is a parent page
- .parent-page-id-### - id of parent page
- .page-template-xxxx - xxxx is the page template
- .blog - if blog
- .single - if single view
- .single-post - if single post page
- .archive - if an archive-like view of posts
- .tag - if tag view
- .category - if category view
- .date - if date view
- .search - if a search view
- .logged-in / .not-logged-in - if user logged in or not
- .single-author - if site has only one author
- .singular - if the page is a singular type page
- .custom-body-class - a class name specified on the per-page options
- .weaverx-theme-body - this page generated by weaver x
- .weaverx-page-xxxx - xxxx is a specific page type. Values of xxxx
can be:
- 404
- archive
- author
- category
- image
- page
- page-blank
- sitemap
- search
- single
- tag
- woocommerce
- .weaverx-sb-xxxx - sidebar layout. Values of xxxx can be:
- right
- right-top
- left
- left-top
- split
- split-top
- one-column
#wrapper - wraps entire site
The area wraps the entire site, and provides the global width, font, and colors.
#header
- Site Title
-
- #site-title
- Site Title with link
- #site-title a
- Site Tagline
- #site-tagline
- Header Image
- #header-image img
- Header Title, Tagline, Search, Header, Mini Menu
- #branding
- Header Search
- #header-search
- Header Mini-Nav
- #nav-header-mini .menu
- Header HTML Area
- #header-html
#container
This area wraps the #content and the primary and secondary sidebars.
#colophon
This wraps footer content.
Other Classes
#comment-title.no-comments-made - .no-comments-made is added to the #comments-title <div> if no comments have been made yet.
More Help - Suggestions
WeaverTheme.com has an extensive help Forum. You can leave questions or comments there. No promises on how quickly you will get a response, however.
Thanks for checking out Weaver. Hope you create a beautiful WordPress theme with it!
Switching from Weaver II
It is important to remember that Weaver Xtreme is a significant re-design of Weaver II. While it is possible to duplicate almost everything Weaver II can do, Weaver Xtreme has a significantly altered <div> layout, and has changed many of the id's, class names, and option names.
We have created a couple of plugins to help with the conversion, both free, and both available at WordPress.org. The first is the Weaver II To Weaver Xtreme plugin. This converter will convert most Weaver II settings to compatible Weaver Xtreme settings. For those settings that aren't directly compatible, the converter will print a report that lists each incompatible setting, and often provides a suggestion for a manual fix. The converter also will non-destructively convert all you old Weaver II Per Page and Per Post settings to Weaver Xtreme Per Page/Post settings. The converter handles both Weaver II free and Weaver II Pro settings.
The second tool is the Weaver Themes Shortcode Compatibility plugin. This plugin supports all but one Weaver II shortcode in any WordPress theme, most importantly including Weaver Xtreme. The plugin will also allow you to use Weaver Xtreme shortcodes on other WP themes.
After conversion, you will likely want to take advantage of at least some of Weaver Xtreme's new features.
The Weaver Xtreme design and option set is significantly more powerful than Weaver II's. Because the design is now more area-centric, and uses inheritance, it is, in fact, somewhat easier to create design with Weaver Xtreme. There area many groups of options that are essentially identical to each other - it is more a matter of understanding the cascading areas used by Weaver Xtreme than it is of learning every available option.
One of the more significant differences is font family handling. Generally, you will get an equivalent look simply by setting the Font Family in the Weaver Xtreme Main Options : Wrapping Areas : Wrapper Area settings. But Weaver Xtreme has more ( and different ) font family choices that can be applied to any of the different areas.
Release Notes
Weaver Xtreme Version 1.0
Weaver Xtreme represents a massive re-write of the previous Weaver versions.
Weaver Xtreme Version 2.0
Weaver Xtreme Version 2.0 most significantly added the totally new Customizer option interface. It's magic!
Weaver Xtreme and this document are © 2010-2014, Bruce E. Wampler. Web Site - WeaverTheme.com